Creating Instagram stories can be a painful and arduous process on a small touch screen such as the one on an iPhone or a midrange Android smartphone. Trying to line up every pixel perfectly, while made easier by Instagram’s UX team, is still unintuitive and it is quite easy to unintentionally completely displace an element or even delete it completely off the draft.
After a bit of time spent contemplating my partner creating her own stories for a brand she’s responsible of, I figured there had to be a way for this process to be less convoluted. And surely enough, after some tests and research, I found the perfect solution that allows anyone to create Instagram stories using their mouse and keyboard with a pretty interface that also supports all of the interactive elements (polls, Q&A, …) that are so important for a story post to be complete.
So without further ado, let me introduce you to Storrito.
What is Storrito?
Storrito is a web-based Instagram Stories scheduling platform made by 3 german developers. It has a free plan that allows you to create and schedule up to 10 stories a month and two paid plans for 100 stories a month and 500 stories a month (15 EUR and 50 EUR/month respectively).
The way the application works when you initially set it up is that it connects your account to one of their emulated phones. The process seems quite secure and I haven’t had any issue with loss of engagement thus far.
Once your account is set up, you get access to the Story Tool that contains all of the current widgets available for you to craft your story from the comfort of your computer.
How to create Instagram Stories with Widgets on your Computer
Eventually, this is how the interface looks once you create an empty story.
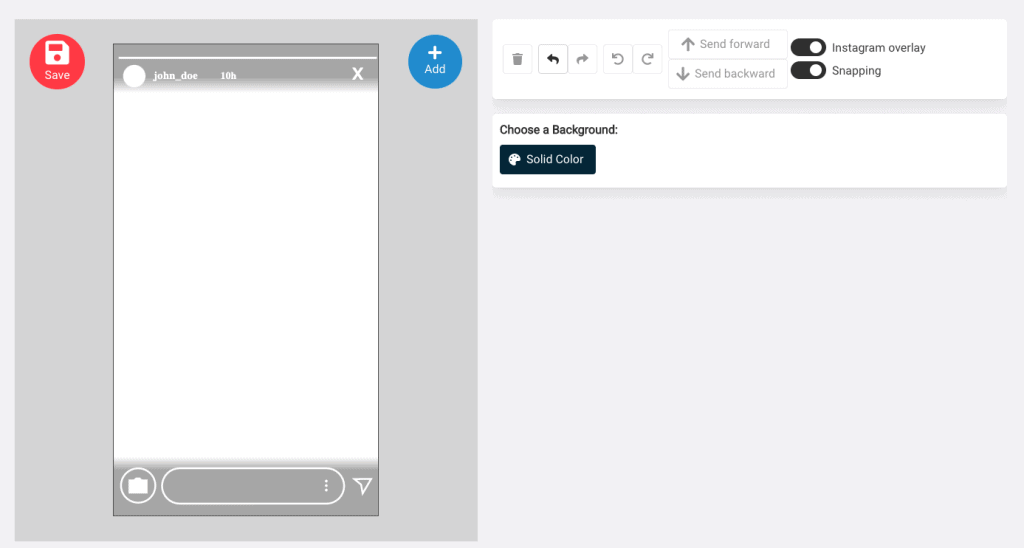
You can choose to enable the Instagram overlay and turn on “Snapping” in order to be able place your widgets easily in the center of the screen. The Instagram overlay is a welcome addition to make sure that you do not place elements over some of the interactive elements of the application once it’s published.
To bring a new element into the story, simply click on the “+ Add” button at the right side of the preview screen.
You will be then greeted by a window containing a list of all of the elements currently available through Storrito.
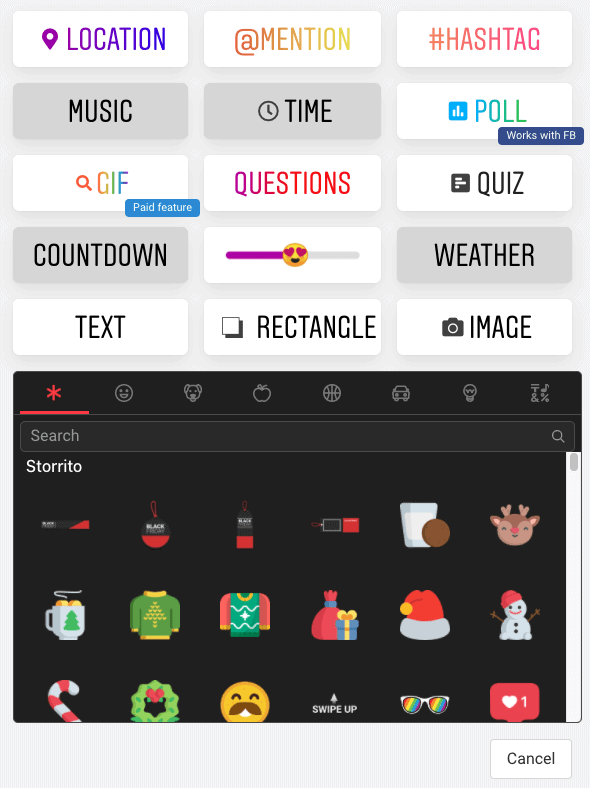
At the time of writing, a few widgets commonly used in Instagram stories are still unavailable on Storrito and are currently being worked on. These include the “Music”, “Weather”, “Countdown” and “Time” widgets.
At this point in time, you just have to click on which widget you wish to incorporate in your story, place it and scale it however you want and jump on the next element of your composition.
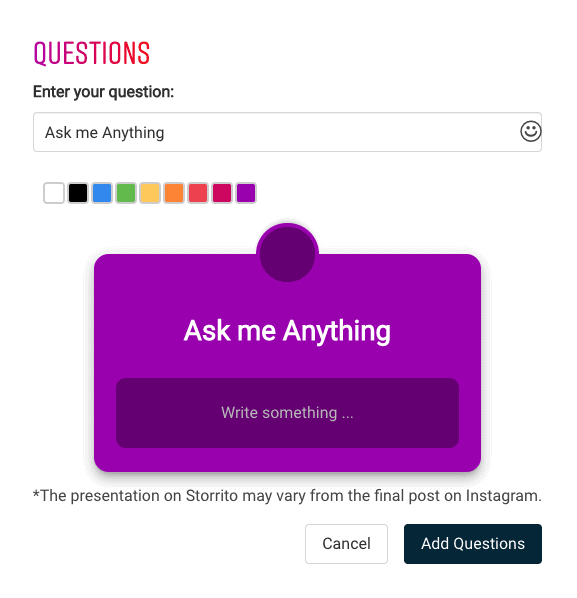
Here you can see the “Questions” widget in action:
Another feature I particularly appreciate is that Storrito provides a connection to Unsplash in order for you to bring stock images easily to your Story compositions.
The application definitely has its quirks and small bugs but I found that none of these were deal breakers and I have never lost any progress or completely ruined a composition while editing a story. Overall it has been a nice enough experience for me to recommend you trying their composer.
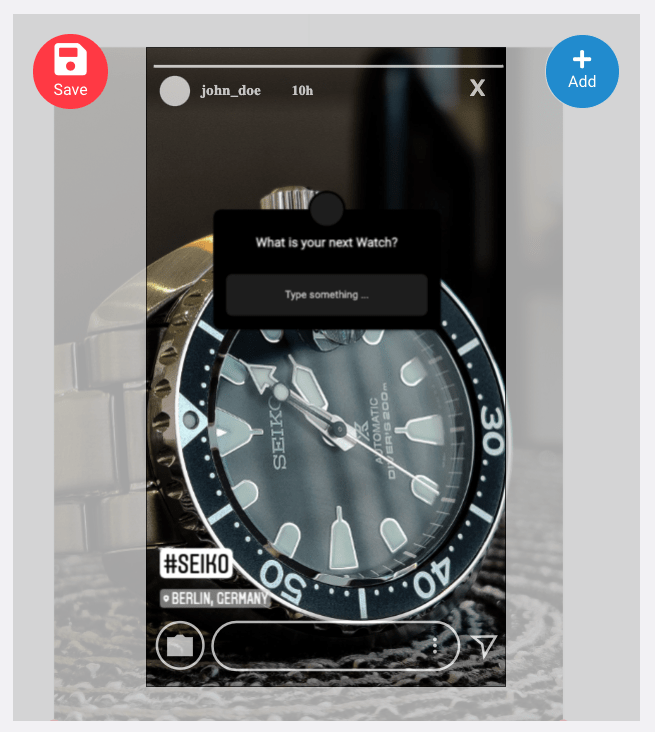
Finally, when you are done with your composition, we can jump on the next step of the process: scheduling.
At this moment in time, you are given many new options.
For instance, if you have a business account with over 10,000 followers, Storrito supports the “Swipe up” feature to redirect your audience to specific webpages.
Then, you just have to select on which Instagram or Facebook account you want to post your story on and either “Post it now” or “Schedule” it to be published later.
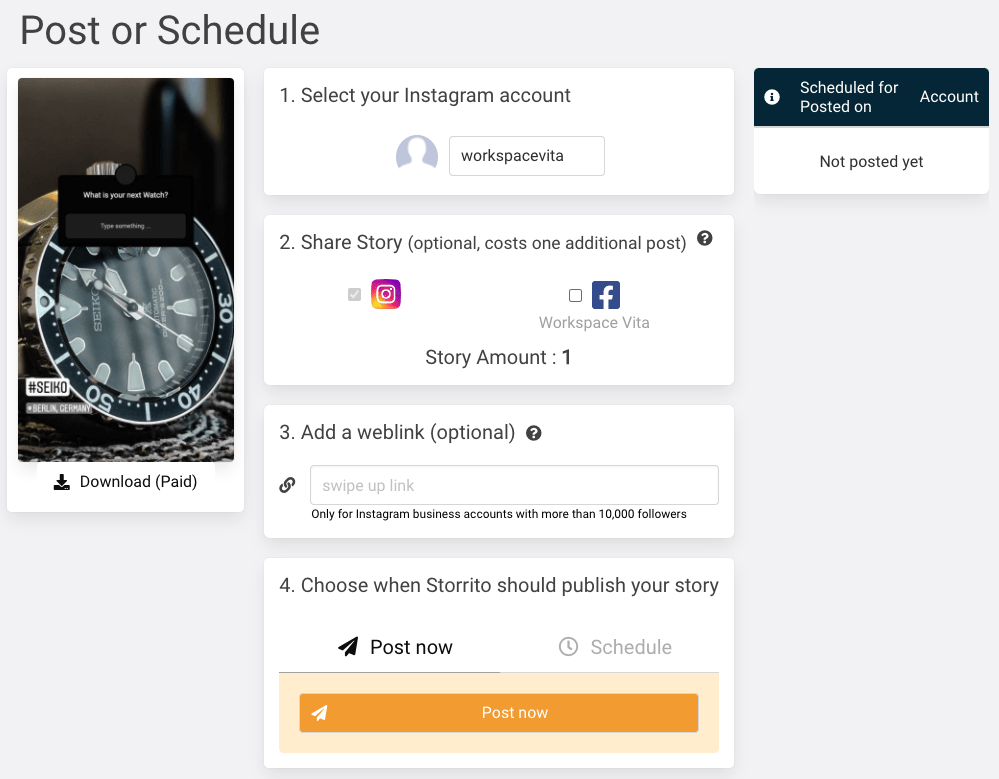
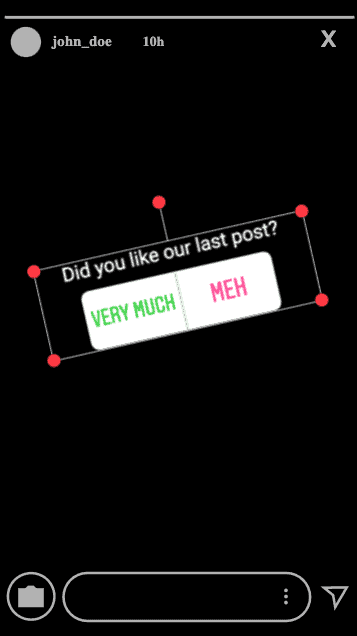
And that’s it, that is really that simple. Your story will then appear as you designed it on your selected account with the proper interactive widgets like you would have created it on your phone. This has proven itself to be a wonderful tool for me to batch the creation of engaging stories and have them scheduled at regular intervals (Think weekly AMAs/FAQs, …).
If you’re interested in how each of the widgets look in the tool and what the customisation options are, I am providing the rest of this article with a separate section for each interactive widget and their options.
However, if you’re just interested in the tool, head over to their website (Affiliate link, but you can use their free version as long as you want!) and discover it by yourself.
How to Create an Instagram Story with a Poll on your computer
The Poll feature of the Instagram Story composer of Storrito is pretty straightforward to use. Once you are on the Story creation interface, click on “+ Add” to get access to the list of widgets and select “Polls”.
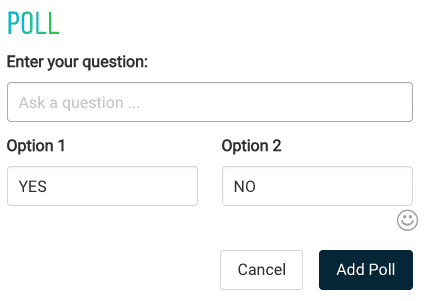
You can then write your questions and the value for your two options. Storrito also has an Emoji picker for easy access. Once you’re done with your poll, simply click on “Add Poll” for the widget to appear in your preview window.
How to Create an Instagram Story with a Question on your computer
The “Questions” widget is another widget available through this application. Once you chose “Questions” in the widgets library, you will be greeted by this window:
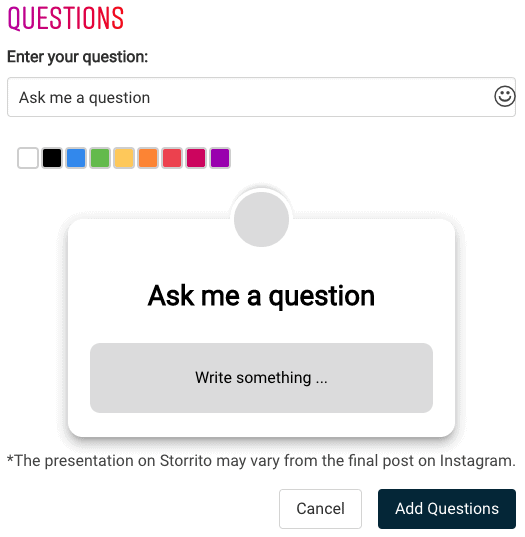
As you can see, Storrito offers all of the variety in terms of customisation that you have on your phone.
Conclusion
In conclusion, Storrito is quite the powerful tool to add to your arsenal if creating Instagram stories is an important part of your workflow. While it has some limitations, these won’t be a deal breakers for the majority of content creators out there and the ability to create and schedule engaging and interactive stories with a keyboard, a mouse and a large monitor screen far outweighs the small quirks I encountered while using this piece of software.
If you have any questions or comments about Storrito, don’t hesitate to reach out to me using the comments section down below. And if you enjoyed this article, I would really appreciate you sharing its link around or considering joining our weekly newsletter full of Marketing Technology/Automation-related tips!


