Making your way to your directories and launching your scripts manually can get tiring, especially if it’s something you have to do every day and multiple times.
This article is part of a series of two articles that are looking to fluidify this process. The first step is to turn these scripts into applications that you can launch with a click of a button and this is what we’re gonna explore in this article. The second step is to schedule these applications to launch themselves without us having to think about it, which I will link to once the article will have been written.
There are two methods that we’re gonna look into today. One is specific to Windows and the other one works exclusively on Mac OS. You can click on the operating system that you’re using below in order to get to the part of the article that is going to work for you.

For Windows
For our Windows users out there, the solution lies in creating a Batch file that is going to navigate through our directories, find the script of your choosing and launch it for you. To do that, we need to open our text editor and write the corresponding lines :
Now, a bit of explanation :
- REM: The line that follows REM is just a simple comment
- ECHO: We use ECHO to return a string. This could be used in case your scripts don’t return anything and you would like to know when your script is done doing its job for instance.
- PAUSE: This last bit is for the purpose of asking the batch file to not close the command prompt once the script will be done. You may choose to not include it at the end of your batch file.
Now, you can see how we cd to the directory where the script is located. Then, we just have to replicate how we would launch the script from our Command prompt. As you can see, we can also include arguments the same way we would when calling a script from the shell.
One of the thing that has to be taken into account is that the Batch file will launch the console from the folder the .bat file will be saved in. Meaning if you put your .bat file in your Desktop, you will not be able to reach scripts that are located in folders that are located one folder up unless you plan for that inside of your bat file (By using cd.. etc.)
Once all of this is set up, we want to save our file with the .bat extension. In my case, I decided to name my file launch_likes.bat. This will create an executable file that will cause our computer to run the tasks described inside it when activated.
And this is pretty much all you need to know for Windows. You can now double click on your file and watch the console go by itself fetch your script and launch it without you having to mess around the Command prompt.
For Mac:
The method we’re gonna use for us Mac users follows the same concept as the way described above for Windows. The goal is to create an executable file that we then will be able to double click on.
To do so, let’s open our favorite text editor and input these lines :
As you can see, the only thing required is the full path of the script followed by the arguments if required. Don’t forget to precede this filepath with the mention “Python”. Also, the first line has to be exactly like it is shown in the code snippet above this paragraph.
When saving your file, make sure no file extension is specified.
Then, copy the filepath of this newly created file into your clipboard and launch your Terminal.
The next thing we want to do is write “chmod 755”, paste the path name previously copied in our clipboard and execute this command.
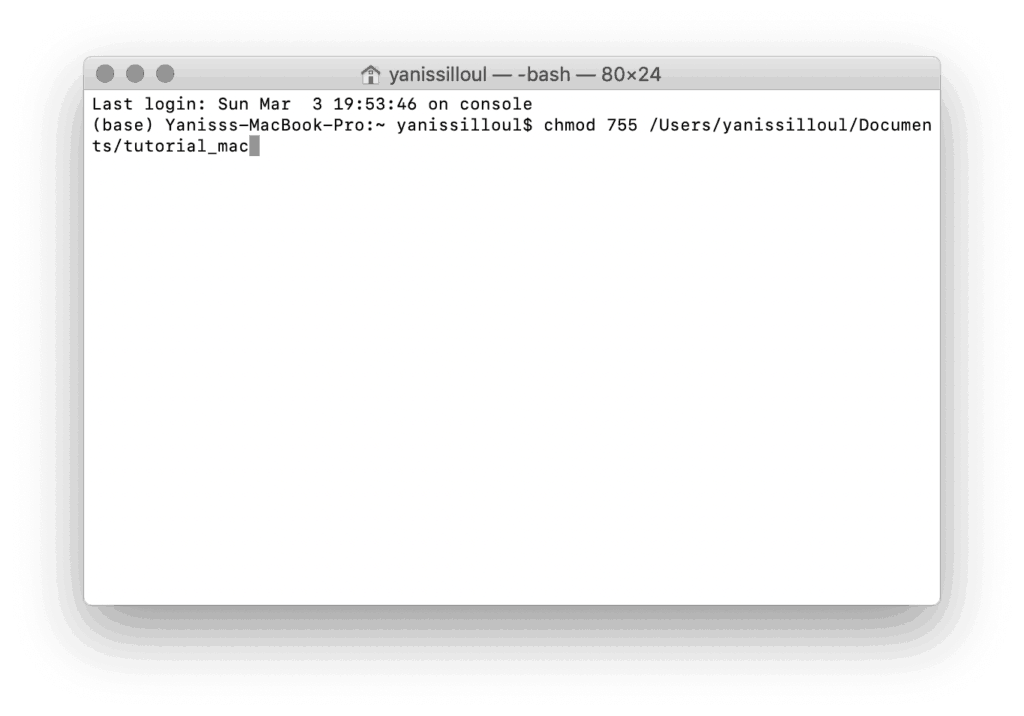
This will convert our extensionless file into a Unix executable that you will be able to double click on to launch your script. You could already stop at that step but for organization purposes and in order to schedule the scripts in the next article, there is still a couple of steps left to do. If you were just looking for an easy way to run your script by double-clicking on a file, you don’t need to go further 🙂
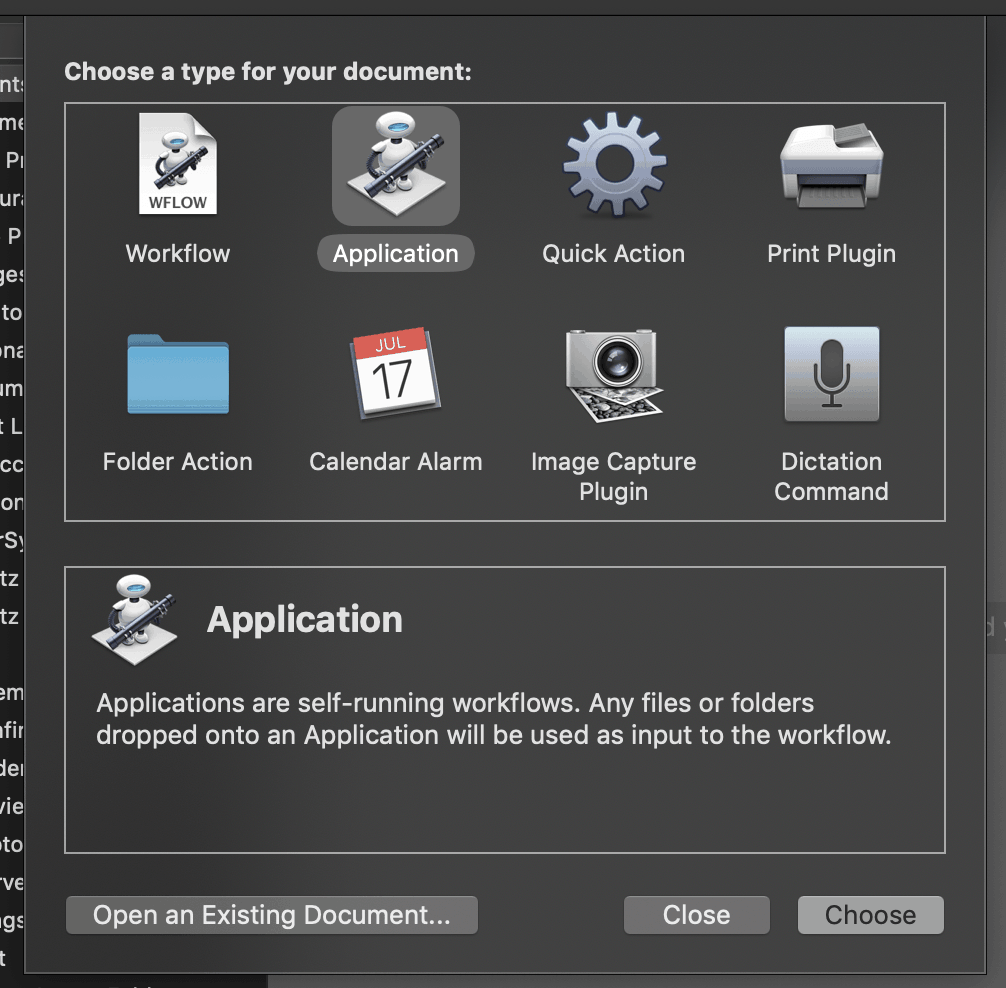
Finally, if you want a real application file instead of a simple Unix executable that you will be able to schedule, we can do so by launching Automator.
After launching the program, choose to create an “Application”.
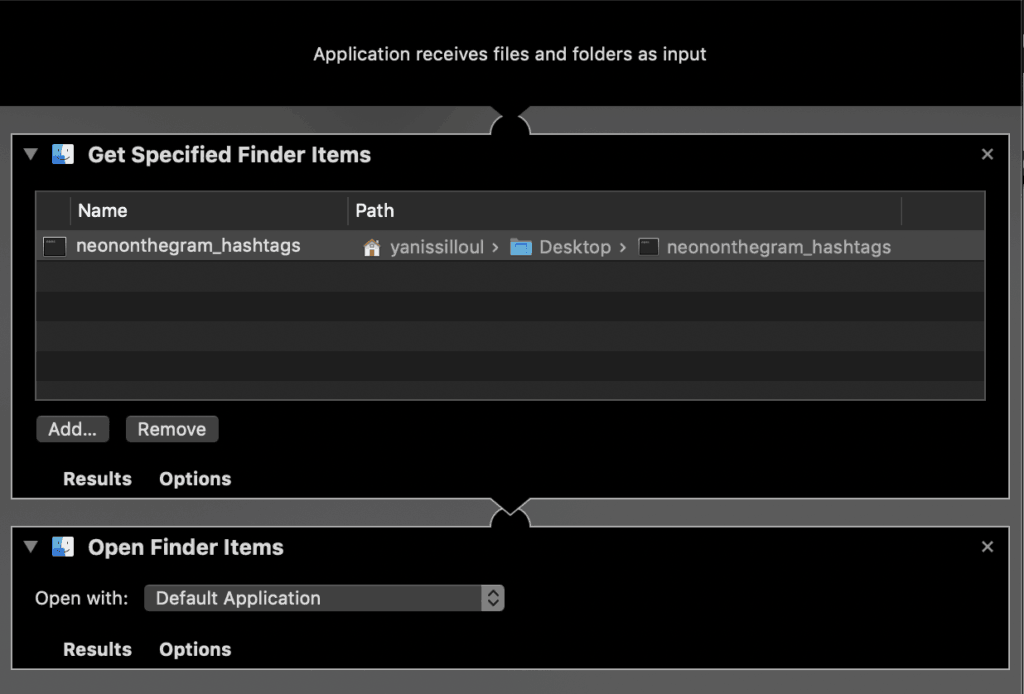
In the list of actions on the left side, get the parameter “Get Specified Finder Items”. Once you added it to your right panel in Automator, you should be able to “Add” an item to this action. At this point, you want to browse through your files and select your Unix Executable.
After that, we need to add a new action, namely “Open Finder Items”. This will trigger to open the file selected previously in its default application.
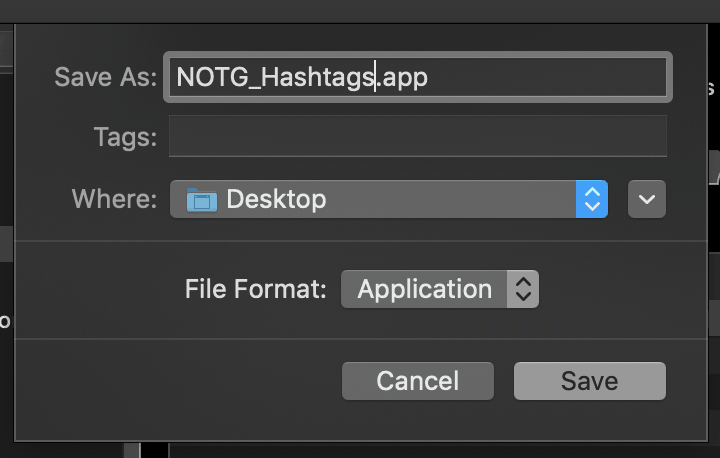
All that’s left is to save. Choose a name that you will recognize and you will now have your own .app file ready to be launched!
And this wraps up our tutorial for the Mac users. I hope this is gonna allow you to spend less time on launching your scripts and more time on creating new ones.
Considering that I know how easy it is to forget to launch a script, especially if you have to do it every day, the next article is covering how to schedule these newly created executable files so that our operating systems will take care of launching those following a set schedule.
Thank you for your time 🙂


17 Responses
What is neonphotography standing for?
Hi Koray, sorry for the delay! Thank you for reaching out to the comments section!
“neonphotography” is an argument that my script required. This way I could use the same script but use a custom variable for each one of them 🙂 You can do the same by using the library sys and the function sys.argv! Feel free to look it up 🙂 I find it extremely useful to use python scripts in a command-line environment.
Hi Yaniss, thank you for your well-explained tutorial. Just discovered your web and it looks pretty neat. Congrats!
Yaniss, for a strange reason, when clicking on the executable my terminal just opens and shows the following:
“””
Gisaels-MacBook-Pro:~ g4$ /Users/g4/Documents/Python\ for\ Automation/Exercise\ Files/OrganizeMe/createApp ; exit;
logout
Saving session…
…saving history…truncating history files…
…completed.
[Process completed]
“””
But it is not running my python script. I double-checked my python script and I believe I did it right.
“””
#!/bin/sh
python3 /Users/g4/Documents/Python\ for\ Automation/Exercise\ Files/OrganizeMe/organize.py
“””
That path is correct, I run the same exact path on my terminal and execute that script correctly. What may be happening?
Could it be that I need to update this part? “#!/bin/sh” ? maybe my python interpreter or bash is installed on that different path? I have no idea what to do.
Thanks!
Mine is doing the exact same thing. I cannot figure out why it won’t run the script successfully.
Bro use Python3 instead of Python… and i didn’t used neonphotography too and my code is perfectly working…
Hey Gaurav,
Yes, as I mentioned in my article, the “neonphotography” part of the script is a sys argument that is getting retrieved from my script. You do not need an argument if your script does not take one.
The only tutorial of all internet that works to my! Thanks!
Are there a method to hide the terminal when I execute the file.app? The terminal looks ugly on the screen.
Any ideas to hide the terminal. I would love to bring GUI app alone.
This was really helpful, thanks.
Thanks for the tutorial. When I tried using this method to run the script on my mac, I got an ImportError for modules I needed to import.
ImportError: No module named requests
Is there a way to by-pass this?
Hello mate! Thank you for your kind words 🙂
So it weirdly looks like your environment does not have requests as part of its set of libraries. Could you quickly run “sudo pip install requests” in your Terminal? Or try this one as well “python -m pip install requests”
I’m getting this error
macbook@Macbooks-MacBook-Pro ~ % /Users/macbook/Documents/Python\ projects/Stock\ trackers/hi ; exit;
/Users/macbook/Documents/Python projects/Stock trackers/hi: line 2: /Users/macbook/Documents/Python projects/Stock trackers/Catan Resource Tracker copy 2.py: Permission denied
Any solutions?
Also, this is what my file looks like:
#!/bin/sh
/Users/macbook/Documents/Python\ projects/Stock\ trackers/Catan\ Resource\ Tracker\ copy\ 2.py
On Mac, just use pyinstaller (pip install pyinstaller). You run:
pyinstaller –windowed [path to mypythonfile.py]
in terminal and it will build a standalone app without jumping through any hoops. Replace [path to mypythonfile.py] with your specific path, no brackets.
I’m using a mac computer, but how do I convert my python codes to a desktop application to be used on windows please help.