Recently, I found myself wanting to add a disclaimer at the beginning and at the end of every article I wrote that is in the Python category.
Rather than manually updating every single one of my articles and pasting the new section, which would reveal itself very time-consuming if I ever want to do this again or update the content, I found that Elementor, the website/page builder I am using for all of my websites, allows for its users to create a template for articles and give them display conditions that are visible depending on properties such as categories of articles or author names for instance.
So in this case, I want to guide you through how to create a single post template that will only display itself for articles that belong in only one WordPress category of your choosing. So without further ado, let’s jump into it.
Requirements
To follow this guide, you will need the page builder Elementor and its Pro version. While not free, this plugin is priced very fairly and has an abundance of features that make it very simple to build and customize a WordPress website. This whole website has been made using Elementor, from its popups, its forms, its design and all of its pages. It’s incredibly easy and has saved me a tremendous amount of time I did not have to spend hiring web developers for coding custom features for my website or install new plugins that would have bloated my website.
The second thing you need is obviously, a category of published articles with at least one article online.
If you are already using Elementor and already have a template for your single posts, you can directly scroll down to this section.
Create a Template for Articles
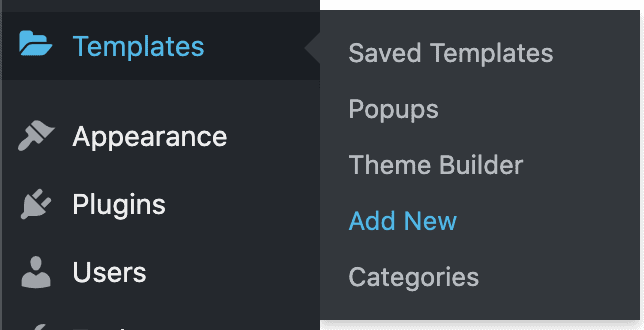
The first thing we want to do is to create a design template for how our single posts should look like when published. To do that with Elementor, we need to head over our WordPress Admin Dashboard and into our “Templates” section on the left-hand side. Then, click on “Add New”.
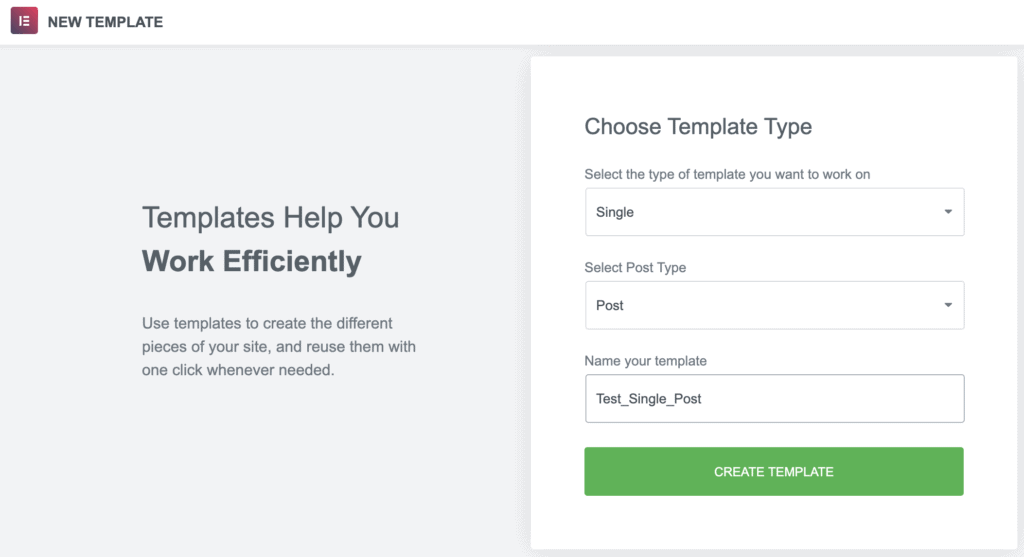
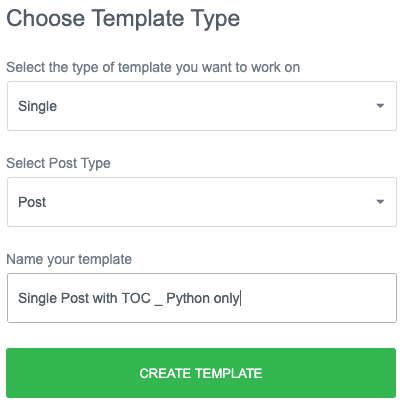
We are greeted by a window asking us what kind of template we wish to create and how we want to name it.
By selecting the type “Single”, a new field will appear wondering what kind of specific post type we want to create a template for. Simply select “Post”, then name your template and click on “Create a Template”
Following this, you should know how to build a page with Elementor. If you are not sure where to start, I highly suggest checking out Elementor’s documentation.
The only elements you really need are the “Post Title” widgets and the “Post Content” one.
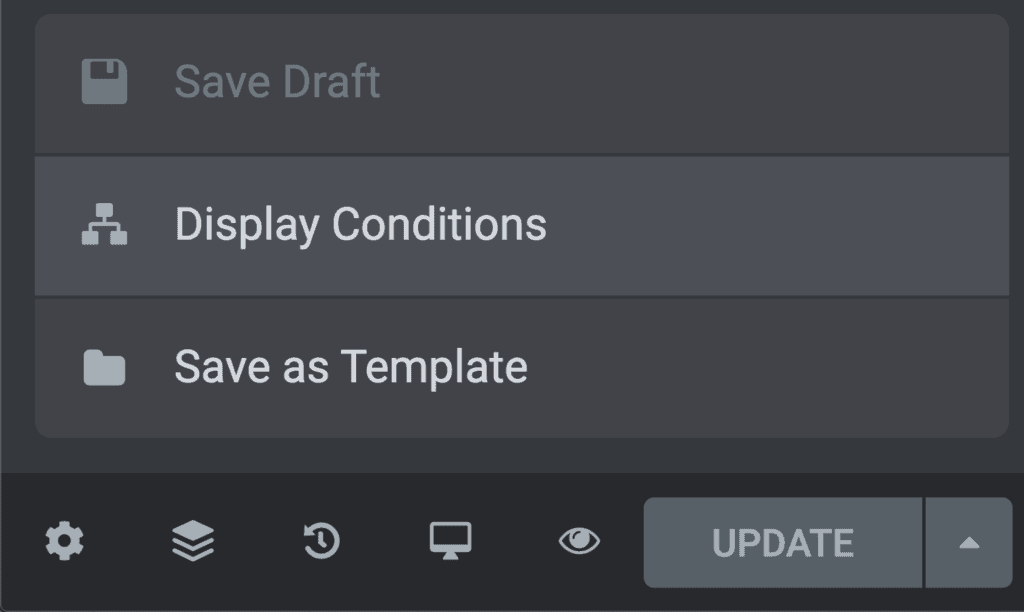
Now that we have our template, we need to define its display conditions. Click on the arrow pointing up next to the Update button at the bottom-left of your screen and click on “Display Conditions”.
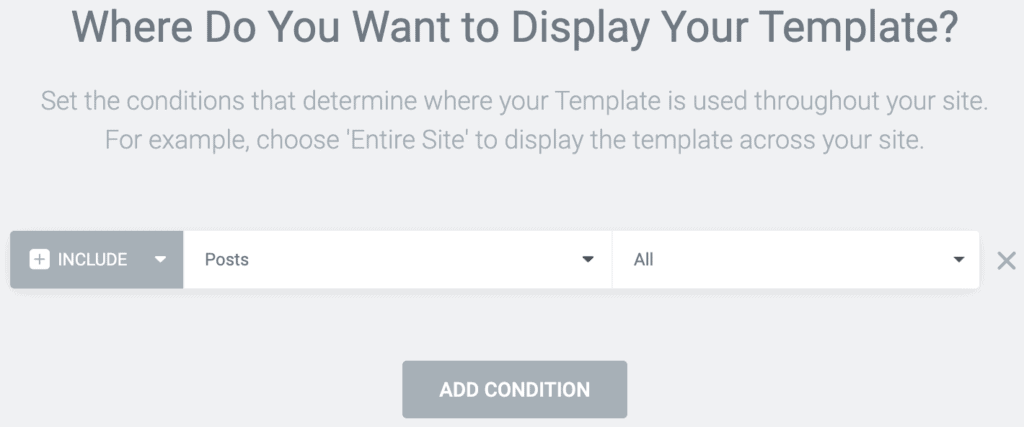
In our case, we want this template to show up on all of the posts…
You may see where we are going to go with this.
Now that we have our Single Articles template for all of our articles, we need to duplicate this template. The goal with this is going to have two templates running concurrently. One will be on all of the published articles and the other one will only be shown on published articles that fall within a category of your choosing.
That way, we can easily edit the template of a specific category of articles and effectively add a text widget that will be shown across all of the articles that fall within this category. So let’s jump on this one now.
How to Duplicate an Elementor Template
Somehow, Elementor has not made it very user-friendly to go with this. It’s very simple but the process might appear a bit cumbersome.
In order to duplicate a saved template in Elementor, we need to start by creating a new one. As explained in the section above, simply head over your WordPress Admin Dashboard and into “Templates” on the left-hand side. Then, click on “Add New”.
Choose the same template type as the one you want to duplicate and name it in a way that will make it easy for you to find. In my case, I want to create a new article template that will only target articles that are in the category “Python” on my website.
Click on “Create Template”.
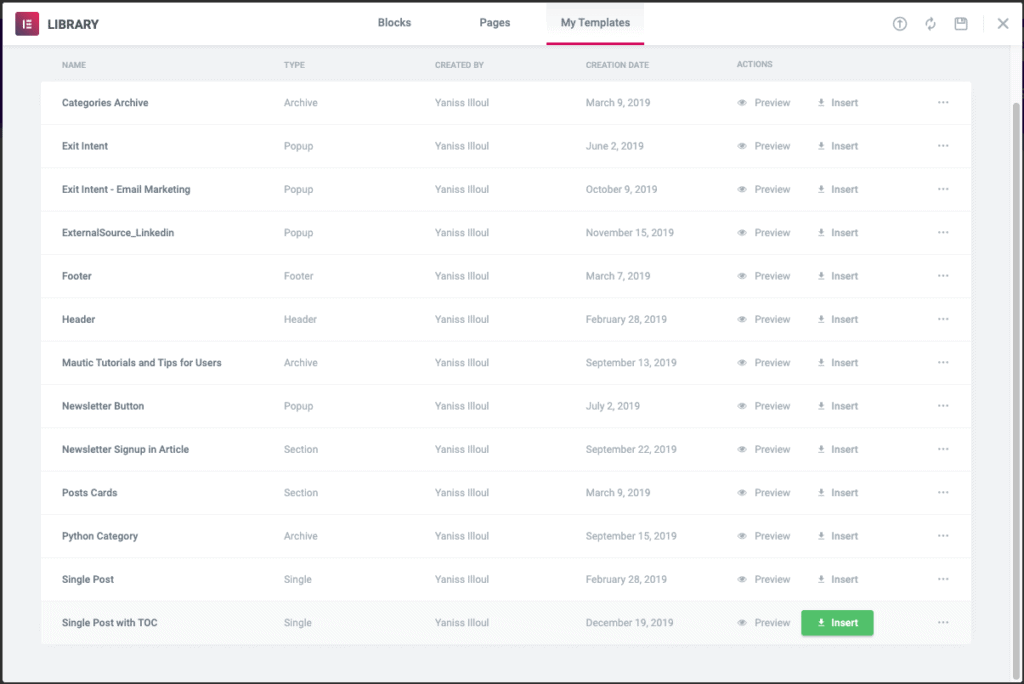
You should end up with the window that allow you to choose which blocks you want to use in your new template. At the center-top of this window, there should be a tab called “My Templates”. This will trigger the appearance of a list of all of the templates that have been created and saved in your WordPress instance. Simply find the template you are interested in duplicating and click on the Insert button on the right of its line like shown below.
A small popup will ask if you also want to import the document settings. Press “Yes”.
And ta-da, you should have a perfect copy of your initial saved template before your eyes.
Now that this is done, we can start editing this new template to incorporate the unique section that will be shown on every article that belongs in one or multiple specific categories.
Add a Unique Section to your Template
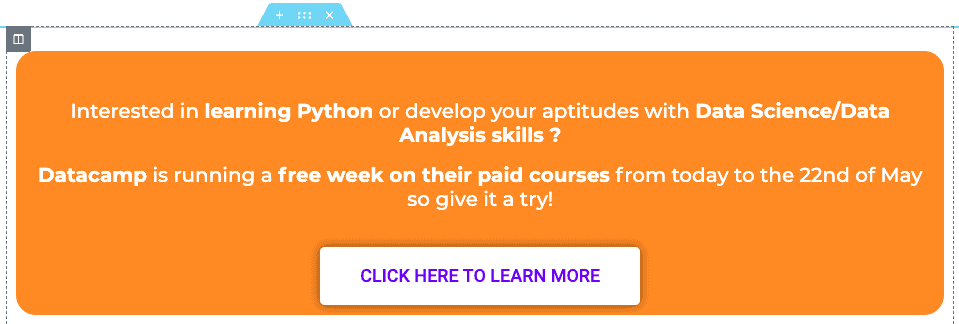
In my case, I wish to display an affiliate offer at the beginning of all of my articles that treat about Python. After having tried numerous websites where to learn Python, I ended up getting a trial with a very nice service and liked it enough to recommend it to other people. I then found out that they also had an Affiliate Program and so I decided that it would be a nice offer to display on my Python-related article.
After a bid of fidgeting, I came up with this new section above the Post Content widget:
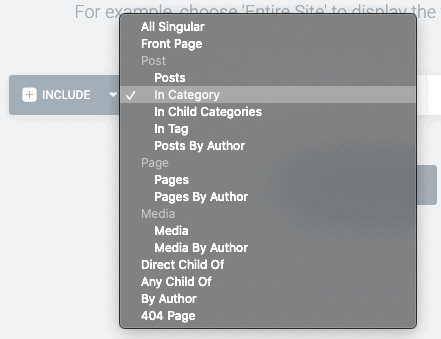
Now that my category specific single post template is complete, I can open the Display Conditions panel in order to define when exactly I want this template to be displayed.
To open the Display Conditions, navigate to the bottom-left of your screen and click on the arrow pointing up next to the Update button and click on “Display Conditions”.
Once we are in the display conditions panel, we can choose “In category” in the dropdown menu like so:
So that we can then write which categories of articles we want to include like so:

This basically means that every article that is tagged with the Category “Python” will be using the newly created Single Post Template.
Finally, we can “Save & Close” our progress and publish our new template.
Now, my Python-related articles will all show the text section I wrote whether as the other kind of articles will not.
In the future, I can easily change the content of the text section to display a new offer and it will automatically update itself to all of the Python-related articles, which is extremely convenient.
Conclusion
And that’s it. I hope you learned something today and that this will help you get more out of your website and visitors. If you have any questions or specific use-cases you’d like to discuss, you can feel free to drop a comment down below or reach out to me by email and I will be glad to help.
Until next time,