Tags are a great way to segment your leads in Mautic depending on their interactions with some emails and senders. Unfortunately, at the moment, Mautic does not offer any way to delete or edit all tags manually. Fortunately, though, there is a way to play with Mautic Campaign Manager and create campaigns that can replicate the desired effect. Let’s get started.
Create a Segment with Tagged Contacts
The first thing we want to do here is to create a Segment that will fill itself with all of your contacts in your database that have been tagged. To do so, create a new Segment, call it “Tagged” and jump in the Filters tab of your Segment.
There, you want to look for the filter “Tags“.
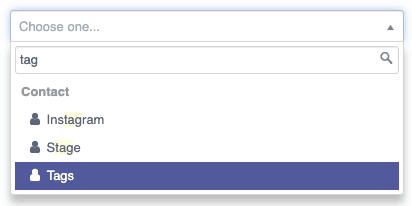
Once you have selected the Filter “Tags”, we want to select “not empty” in its selection field like so:
From now on, we can wait for Mautic to update the segment.
Once your segment is updated, we are good to proceed to the second part of this article.
Create the Remove Tags Campaign
In order to remove all of the tags our contacts have, we need to create a customized Mautic Campaign.
Head over to your Campaigns window and create a New Campaign.
After naming your Campaign something along the lines of “Remove Tags Database“, proceed to the Campaign Builder located at the top right of your screen.

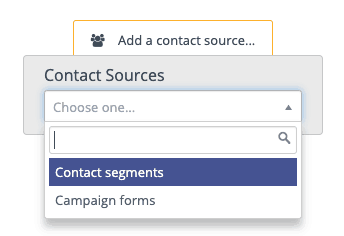
Once you’re there, the first step in this Campaign tree of actions is going to be selecting the Segment source.
In this case, we want to select the Segment “Tagged”.
Once your segment is selected, click on one of the little grey dots and click on the “Select” button below the blue “Action” area.
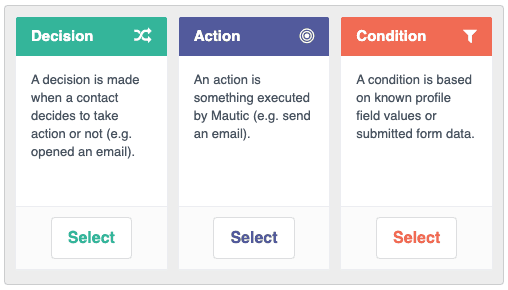
By doing this, we are getting Mautic ready to do an action as soon as the instance detects a contact in the segment “Tagged”.
In our case, we want to select the Action “Modify contact’s tags“.
Once this has been chosen, a window will appear, prompting you to choose which tags you want to add or remove. In our case, I selected all of the tags that existed on my instance like so:
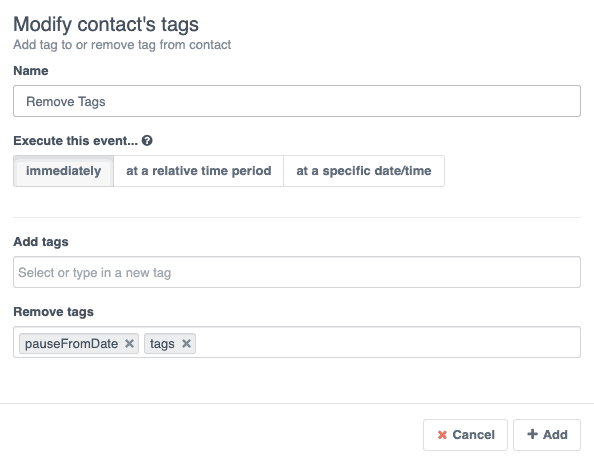
Once this is done, you can proceed by validating your action with the button “+ Add” and close the Campaign Builder.
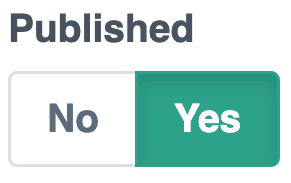
Finally, make sure you “publish” your Campaign in the Campaign settings.
And that is it. Once your Cron Jobs will trigger, the entire Segments of Tagged people will run through the steps of your Campaigns and all of the tags you put in your Campaign Action will be removed from each and every one of those contacts. Overall, a pretty easy and not so painful way of getting rid of specific or all of your tags for your thousands of contacts stored in your instance.
If you have any questions, please reach out through the comment section down below and I will try and fix whatever issue you’re encountering from these explanations.
As always, if you liked this article, feel free to go through the rest of my website or sign up to my newsletter to be notified whenever I go live with something I think could be useful to you.
Thank you for your time,