In this article, I want to introduce you to Photoshop Scripting in Python on Windows. For all of you Mac users, there is a way but it involves knowledge in AppScript which I don’t have and therefore can’t teach. If you’re a Windows user or if you have Windows on a partition of your Mac, you will just need any version of Photoshop installed to follow this tutorial.
I needed to programmatically create multiple images from a Photoshop template and have each different file output the template with a different text inside one of its text layers.
The goal here is going to be to use a basic Photoshop template with multiple text layers, edit the text value of said layers and export the result in a PNG format. With the use of functions and loop, I will also show you how I automatically create hundreds of images at once. Ready? Let’s do it.
If you are more interested in watching a video tutorial, you can click on the thumbnail down below to launch it in this format. I would appreciate if you could leave a like on the video if you found it helpful :). Thank you!
Open Photoshop with Python
The first thing we want to do is to launch Photoshop. To give the order, we are going to need the Win32 COM and the OS module. With that imported, we can launch our Photoshop application and store it in a variable that we will call psApp like so:
You probably noticed by now, but executing the code presented above will trigger the launch of your Photoshop application. Now that this is done, we can move on and open our .psd file that will act as the base/template for all of the variants we are going to create.
To open a .psd file in Python, we just need to call the class “Open” of our psApp object and reference the path of your .psd file like so:
This piece of code, once executed, should open your template in your Photoshop instance.

How to Change the Text Content of a Photoshop Layer with Python
Now we need to create the object containing all of your layers. Let’s call it “doc”, for document.
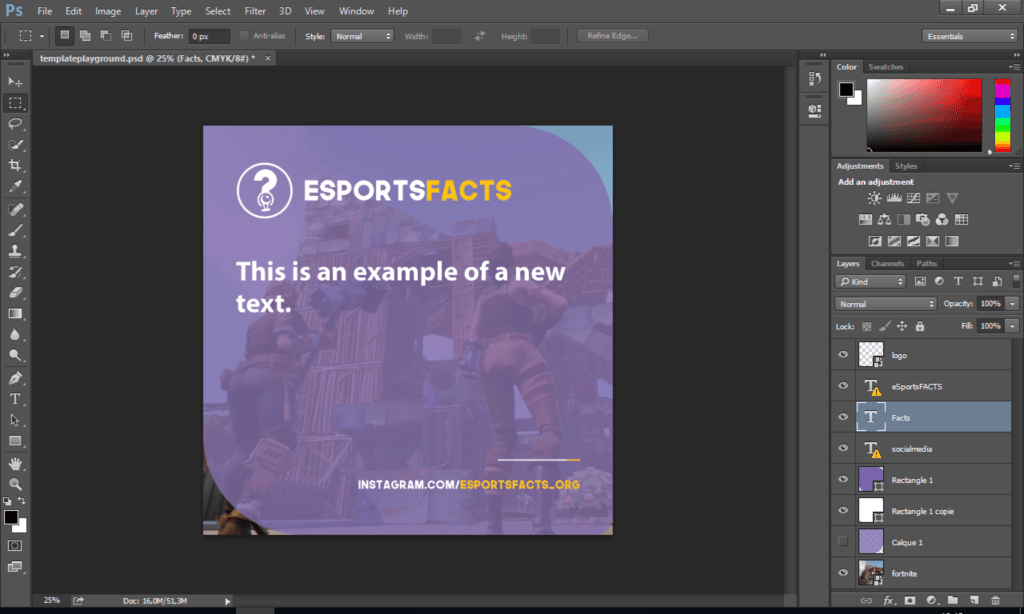
The next step now is to look for the layers you’re interested in editing and explore their content. In this case, I want to access the content of the layer “Facts” so I can eventually edit it. To do so, we need to call the class “ArtLayers” of the variable storing the document and then call an other class that will allow us to edit its content. Follow these steps:
And voilà.
Change the Size of the Text Layer with Python
Let’s say you realize some of your text does not fit in your original layer. The ideal solution here would be to be able to change the font size. Well, we can do just that with a simple command like shown here:
Result:

How to Resize Images in Photoshop with Python
If you find yourself with a lot of images to resize, then you must want to be able to automate with somehow. Thankfully, this Python module allows for an easy way to resize your active document.
This is the code we are using to do so:
Note that Height, Resolution and ResampleMethod are all optional arguments. You can very well simply specify the Width and Photoshop will keep the proportions of your file and the resolution as it was by default. Pretty easy.
How to Hide/Show Photoshop Layers with Python
One of the things I really wanted to do with this template was being able to switch up the background image depending on what the text was about. For instance, if the text was related to the video game Fortnite, I wanted to display a Fortnite-related background image. If the text was about Call of Duty, then have the code make the background image about Call of Duty.
In order to do that, I needed to find a way to trigger the layer visibility parameter with Python. Thankfully, there is an easy way to do so, as shown in the snippet below:
The first thing we want to do is to select which layer we are going to act on as depicted in the first line. Simply replace “Name_of_Layer_Here” with the name of the layer you are interested in either displaying or hiding.
The second line of code sets the “visible” status. The only thing you need here is to either set it as “False” to hide the layer, or “True” to display the layer.
And just like that, we can run this code concurrently with something like a text edit in order to automatically adapt the background or any other image to the new content that is being generated :).
PNG Export in Photoshop with Python
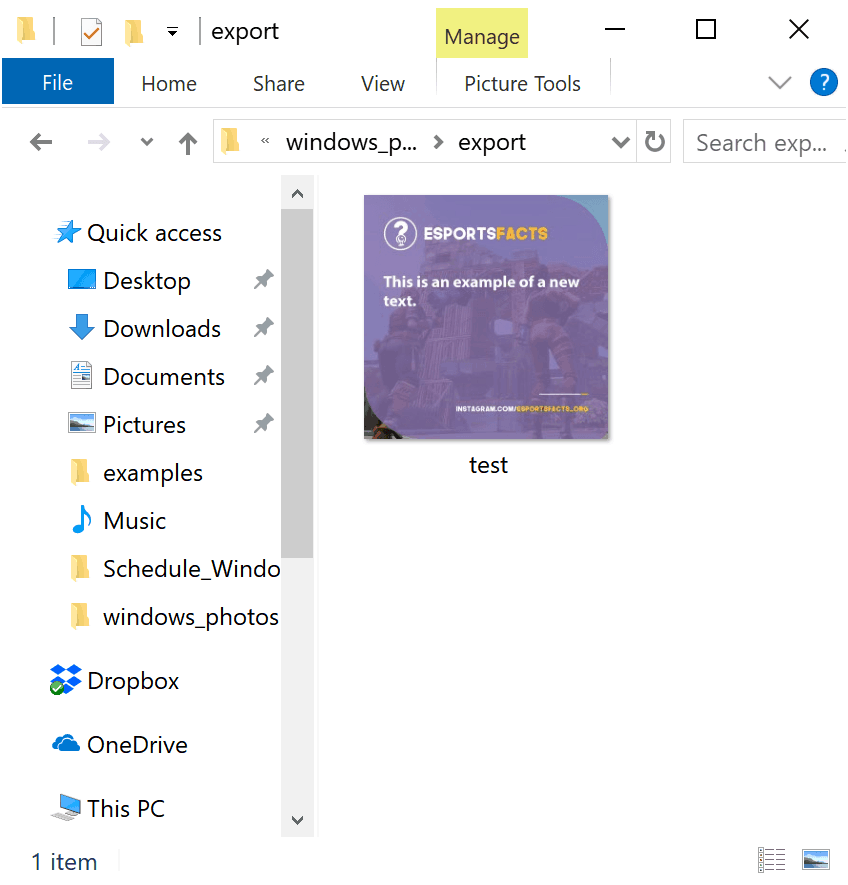
After having concluded the edits we wanted to do, it is now time to export the result in a web-friendly format. To proceed with this step, we need to determine the parameters of the export and provide the path and name of the file we want to output. Here is the code required to follow this step:
Once all of these variables have been set, we can export our file using this line of code:
And here is the file in all its glory:
JPG Export in Photoshop with Python
JPG is another file format that is commonly used to save files in at the end of a project. Fortunately, saving a Photoshop project with python as a JPG file is as easy as saving a file in PNG.
Here are the parameters of the export you need to follow:
As you can see, we only had to change the Fornat option to the number 6, which represents the JPEG format for Photoshop. The third line also allows for adjusting the Quality of the file like you would by saving manually. The scale is from 0 to a 100. If you don’t specify a quality option, the default value will be 60.
Create Variants based on a Photoshop Template with Python
Now that we know how to change the text of a layer in Photoshop with Python and how to export the result, it is time for us to set ourselves to create tens of files in the blink of an eye. I will share here how you can create hundreds of images the same way I did with my now defunct Instagram page Esports Facts depicted below.

The text you can see in these images has been pulled out of the API from the website Esports Earnings. For the benefit of simplicity, we will simply create a dictionary that contains some text and create a loop together.
The first thing we want to do here is create a dictionary with some samples values like this:
Once this is done, we can create a simple loop that will:
- Replace the content of the text layer by the content of the value in the loop.
- Define a name for the file that is going to be exported.
- Export the file
And that’s how the code looks. Now let’s deconstruct this piece by piece.
Line 1 and 2 are here to select on which layer the code is going to work on. The layer “Facts” is the text layer that is hosting the text I am looking to edit.
Line 4,5 and 6 are the PNG Export parameters we’re going to give to the program so it knows in which format it should export the file.
Line 8 is the location of the folder where we want the files to end up. The full pathname is going to be constructed based on this root location later.
We then enter the loop. For every key and its value present in the dictionary, line 16 changes the content of the text layer “Facts” to the value of the key the loop has been presented with.
Line 18 is pretty important because it is creating the full path where the export will take place and under which name the file will be saved as. Here, the name of the file becomes the key of the dictionary in the loop with the “.png” extension.
Finally, line 20 actually proceed to export the result following the parameters set in line 4,5 and 6 and the fileName set in line 18. Rinse and repeat for every key/value combination present
And here are the results:
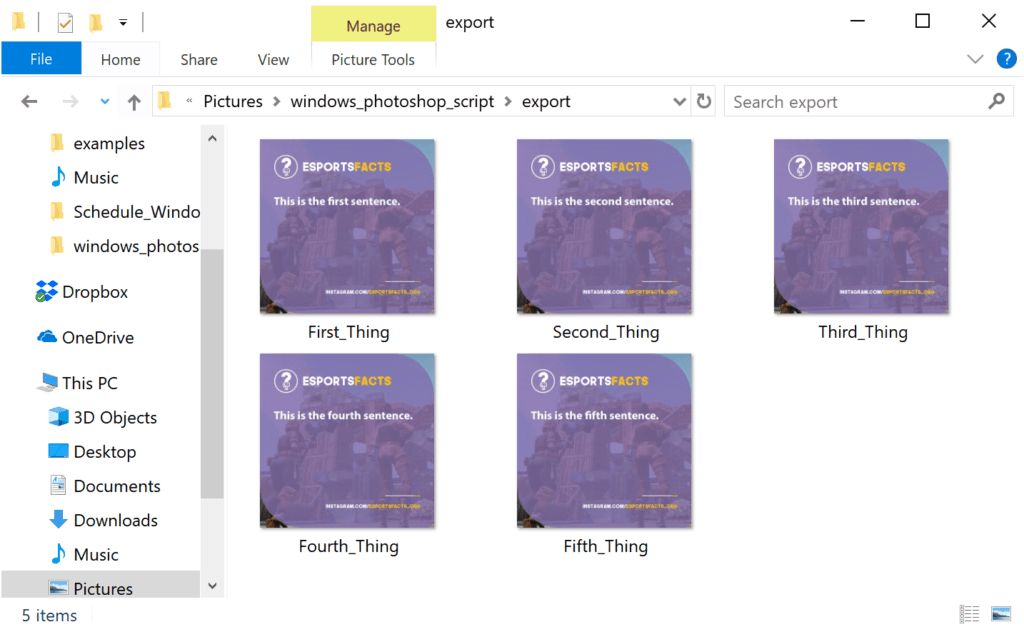
As you can see, everything worked as planned 🙂
And that’s pretty much it for me. As you may have noticed, this is a pretty basic edit but I’m confident this should help a good amount of people out there that were in the same boat as I was. If you’re looking to learn more, don’t hesitate to reach out to me in the comments and ask me what kind of edits you would like to automate with Python in Photoshop and I will try and make a tutorial related to these edits.
Once again, if you have any questions, feel free to email me or post a comment down in the section below.
Talk to you soon.


31 Responses
thats cool! but is it possible to export every layer as a png? im stuck with just count all layers for foreach
Hi,
i see that here, the text autofit to the frame (it insert automatically a new line). I tried on my own but it prints the whole text in one line.
Do you know a solution for that problems?
Thanks in advance.
Hey Sebastian!
In my case, my text layer already had enough space to fit as a square.
You can see an example here: https://imgur.com/a/oo91HI4
If you set your text layer properly the first time, then the text will automatically fit in the frame, supposedly 😮
Hello , I only want to convert tiff to jpg with a python script by using the client of photoshop.
I have thousand images.
Any idea?
Hi Renzo,
I did some experimenting and I think I came up with a solution that should help you. I found how to load a tif file in Photoshop with Python and how to save as JPEG. If you then create a proper loop function, you should be able to automate the conversion of as many images as you’d like from whatever format Photoshop can read to jpeg 🙂
Here is the documented code:
import win32com.clientimport os
psApp = win32com.client.Dispatch("Photoshop.Application")
It starts like before. Open Photoshop.
#Open your TIF filepsApp.Open(r"C:\Users\You\Replace\With\Path.tif")
doc = psApp.Application.ActiveDocumentoptions = win32com.client.Dispatch('Photoshop.JPEGSaveOptions')folderRoot = r"C:\Users\Export\Path\Folder\"
jpgfile = folderRoot + "/filename.jpg"
doc.SaveAs(SaveIn=jpgfile, Options=options)
doc = psApp.Application.ActiveDocument.Close()
And that is pretty much it. You’d obviously have to build the logic for loading the TIF files but I’m hoping this is something you can do already 🙂
I will try and make a detailed article about this or edit the current one and add this functionality that I just discovered.
Thanks for your comment! I had not thought about doing this 😀
Please make a tutorial on saving file as jpeg and resizing images
I really wasted a lot of time writing these functions, but here they are at last!
How to resize an image and how to place it anywhere on the screen
def resize(layer,w,h):
w_max = w
h_max = h
bounds = layer.bounds
w = bounds[2] – bounds[0] – 44
h = bounds[3] – bounds[1] – 42
#print(w,h)
diffw = w_max – w
diffh = h_max – h
#print(diffw,diffh)
aumw = diffw + w
aumh = diffh + h
#print(aumw,aumh)
moltw = 100*aumw/w
molth = 100*aumh/h
#print(moltw,molth)
layer.Resize(moltw,molth)
bounds = layer.bounds
w = bounds[2] – bounds[0] – 44
h = bounds[3] – bounds[1] – 42
return w,h
def translate(doc,layer,goalX,goalY):
bounds = layer.bounds
w = bounds[2] – bounds[0]
h = bounds[3] – bounds[1]
posX = doc.width – round(doc.width – (bounds[0] + w / 2))
posY = doc.height – round(doc.height – (bounds[1] + h / 2))
image1.Translate(goalX-posX,goalY-posY)
bounds = layer.bounds
w = bounds[2] – bounds[0]
h = bounds[3] – bounds[1]
posX = doc.width – round(doc.width – (bounds[0] + w / 2))
posY = doc.height – round(doc.height – (bounds[1] + h / 2))
return posX, posY
did you get any answer?.
I tried the code that you have written here but it gets stuck on the Save As dialog box and requires manual pressing of the save button.
Hi Renzo,
You can try use `openimageio` or `imagemack`.
Hello, I see that you can create multiple files with different text in one shot. I have a file that contains text and a picture of somebody. I need to change the text on the picture to their name and the picture of the person multiple times. the picture needs to be in the exact position every time. Is this possible?
Hi Yannis,
Thanks for putting this article and video together. It was super helpful. What documentation do you use to figure this out? I have been looking all over and cant find anything. Also I am trying to figure out how to save my files as a PSD after going through a for loop.
Hi Luke! Thanks for reaching out!
Oh I’m sorry I thought I linked to the documentation I used in my original post. This is the PDF link to the VBScript reference documentation I used to figure out everything mentioned in this article/video: https://www.adobe.com/content/dam/acom/en/devnet/photoshop/pdfs/photoshop-cc-vbs-ref-2019.pdf
I will try and look into how to save as PSD in the meantime, I will get back to you by email and will update this article once I figure this one out 🙂
Thanks again for the comment!
Hi Yannis,
Thanks for reaching back out. I figured out how to save a psd. When I get a chance to flip back to my Windows side of my computer, I’ll post what I found.
Another question I have is about images. I have figured how to place a new image in my photoshop file, but It always comes in the middle of my document. Have you had any luck moving images to different coordinate locations (i.e. (0,0)). I know that moving a text layer is possible, but haven’t figured it out with images yet.
Thanks again,
Luke
I was able to save my photoshop file as a psd by completing the following:
options = win32com.client.Dispatch(“Photoshop.PhotoshopSaveOptions”)
psdfile = f”C:/Users/{enter your username}/Desktop/{name of folder you want to save to*}/{name of psd file*}.psd”
doc.SaveAs(SaveIn = psdfile, Options = options)
*I used f-string so I could maintain the ability to save psd files in certain folders based on column headers (folders need to be created prior to saving or it won’t work) and used column headers for saving the file as well
example of psdfile string:
psdfile = f”C:/Users/luke/Desktop/{position}/{first_name}_{last_name}.psd”
*I have a column header called “position” that is categorical saying what position the person plays. As a reminder you will need to create a separate folder for each category on your desktop before saving.
*I have column headers called {first_name} and {last_name}. This allows me to uniquely name each psd file.
Hi,
Please guide me in inserting and placing the photo in a layer if you have reached a conclusion.
hi Luke!
can you please explain how you place images in a PSD project and what is the code for this function?
thanks
Hi, first of all, thanks, I want to replace a smart object in the psd file with another image, but I couldn’t succeed.
Hi ,
First my appreciation for this article, this really helped me a lot.
I need to change the text in psd template and save it in respective file names by fetching datas from excel sheet.
I tried and but couldn’t get succeed. can you help me with that.
Hello, thanks for this article it helped me a lot. But I have a question, How do I get the script to select a file such as barcode.png and replace the image named “Barcode” in Photoshop template with barcode.png? It’s a smart object.
Hey Yannis , thank you so much for this, however I have a question can an image be replaced in an image layer in the same way that you replace the text?
Hi Yannis, thanks for the great article, but want more helpful information. For example: can I import images, work with layers (combine and arrange) and create strokes. And if possible, how to do it or where can you find documentation?
Hi, very nice video! please keep going!
Could you please make a video how to apply a photocopy effect on a image and save it?
Best Regards.
How to export it as a “.pdf” document?
Hi, this is very nice!
Could you help me edit the text layer if that layer is in the group?
I have try with this but getting error.
psApp = win32com.client.Dispatch(“Photoshop.Application”)
psApp.Open(psd_template)
doc = psApp.Application.ActiveDocument
layer_name = doc.ArtLayers[layer]
text_of_layer = layer_name.TextItem
text_of_layer.contents = ‘test script’
This error I found
layer_name = doc.ArtLayers[layer]
File “C:\Users\pl10004\AppData\Local\Programs\Python\Python38\lib\site-packages\win32com\client\dynamic.py”, line 283, in __getitem__
return self._get_good_object_(self._oleobj_.Invoke(dispid, LCID, invkind, 1, index))
pywintypes.com_error: (-2147352567, ‘Exception occurred.’, (0, ‘Adobe Photoshop’, ‘No such element’, None, 0, -2147352565), None)
To get the layer groups, you have to use doc.LayerSets instead of doc.ArtLayers
hi, how can I open smart object layer and edit it ( load image and resize there and save it )
can anyone help me, please
Thank you for this post, it is really helpful for getting started!
Any idea how to use the magic eraser tool?
bro, do u have a link for documentation about win32com.client and photoshop? i need to check some layer names and click them