Welcome to this second part of the
Once again, I invite you to click on the Operating System you’re going to be using in order to navigate to the section that will work for you:
For Windows
Now that we have our .bat file from the last article, the easiest way to schedule their execution is to use the built-in Windows Task Scheduler included in Windows. So let’s launch that shall we ?
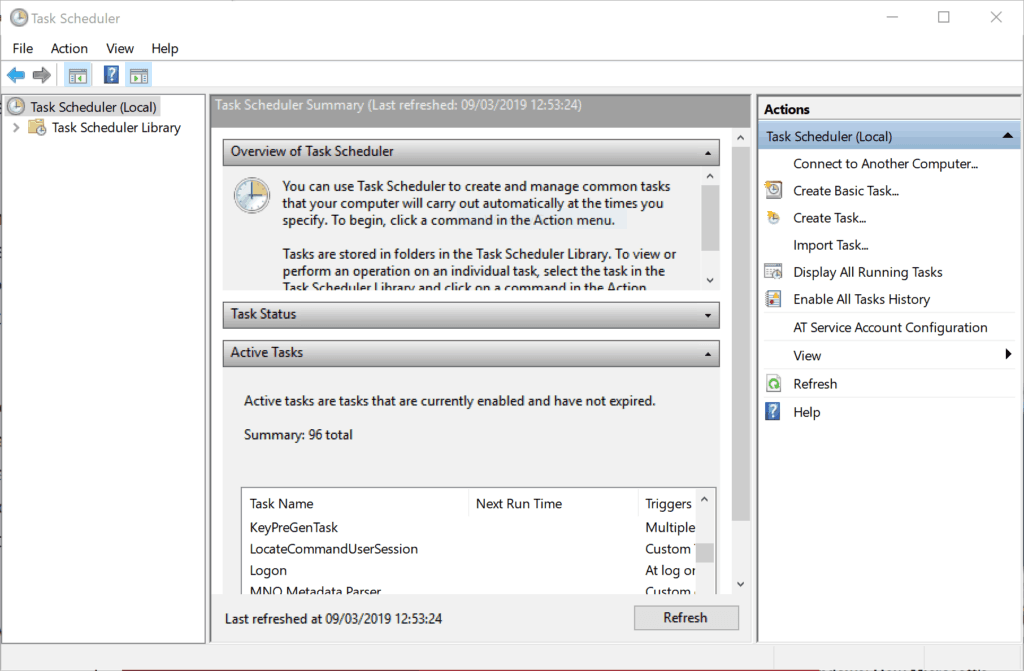
We’re greeted by that not super intuitive looking Window. Baiscally, the Window Task Scheduler contains all of the scheduled tasks that your computer is doing in the background.
In order to not mix ourselves up with the vital tasks that our computer is performing on a daily basis, I suggest we create a new folder that is going to contains all of our customised scheduled tasks.
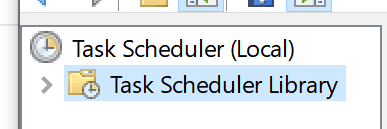
Click on the folder “Task Scheduler Library” on the left side of the window and on “New Folder” as shown in the screenshots below.
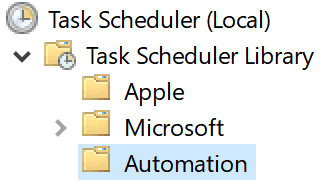
I named mine “Automation” and it now sits after the Apple and Microsoft folders.
Now that we are inside our folder, we can create tasks that will be easy to access and edit. To create a new task, you can simply click on “Create a Baci Task” and follow the wizard included with the program. This should allow you to create a simple schedule for your scripts but for the purpose of this article, we are going to explore the Advanced mode that allows way more customization regarding behavior.
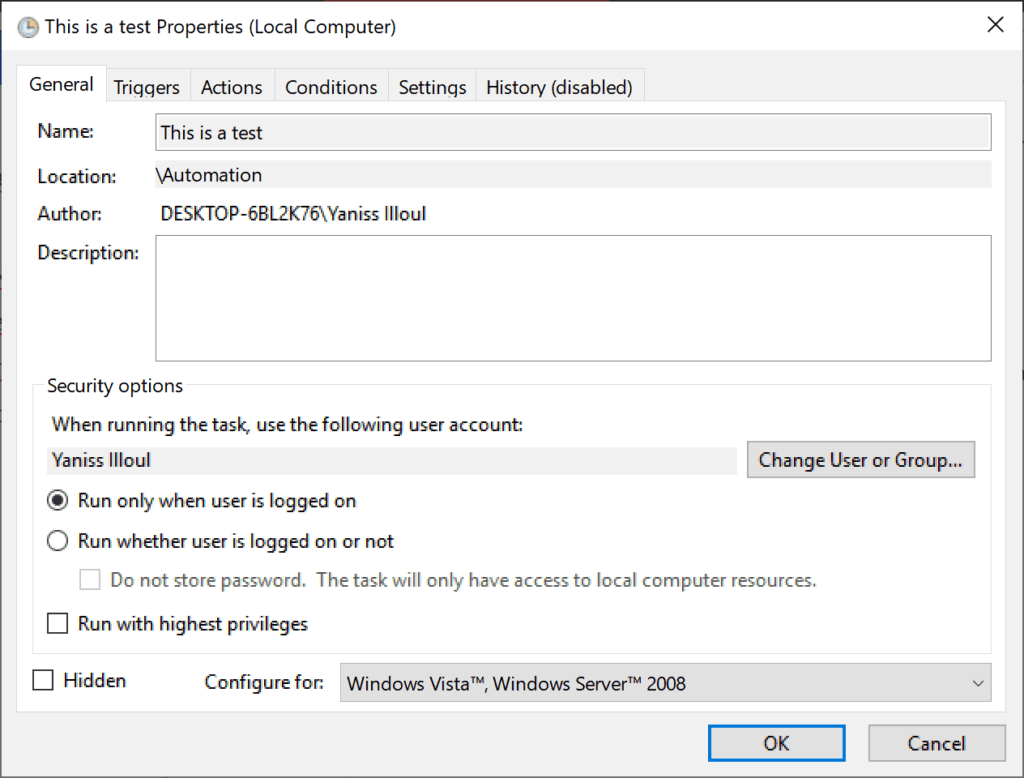
After having clicked on “Create Task”, your first screen offers you to name your task. I suggest going with something very easy to understand as you may create a lot more down the line and have to edit some of them as you go. You also get some customization features that allow you to let the task run even if you are not logged in.
In the second tab “Triggers” of the “Create Task” window, you can finally set your schedule, aka when you want your application to run as well as setting an expiration date and other useful parameters. One of the interesting things here is that you can choose to run your task every time you boot your machine up or when you log in.
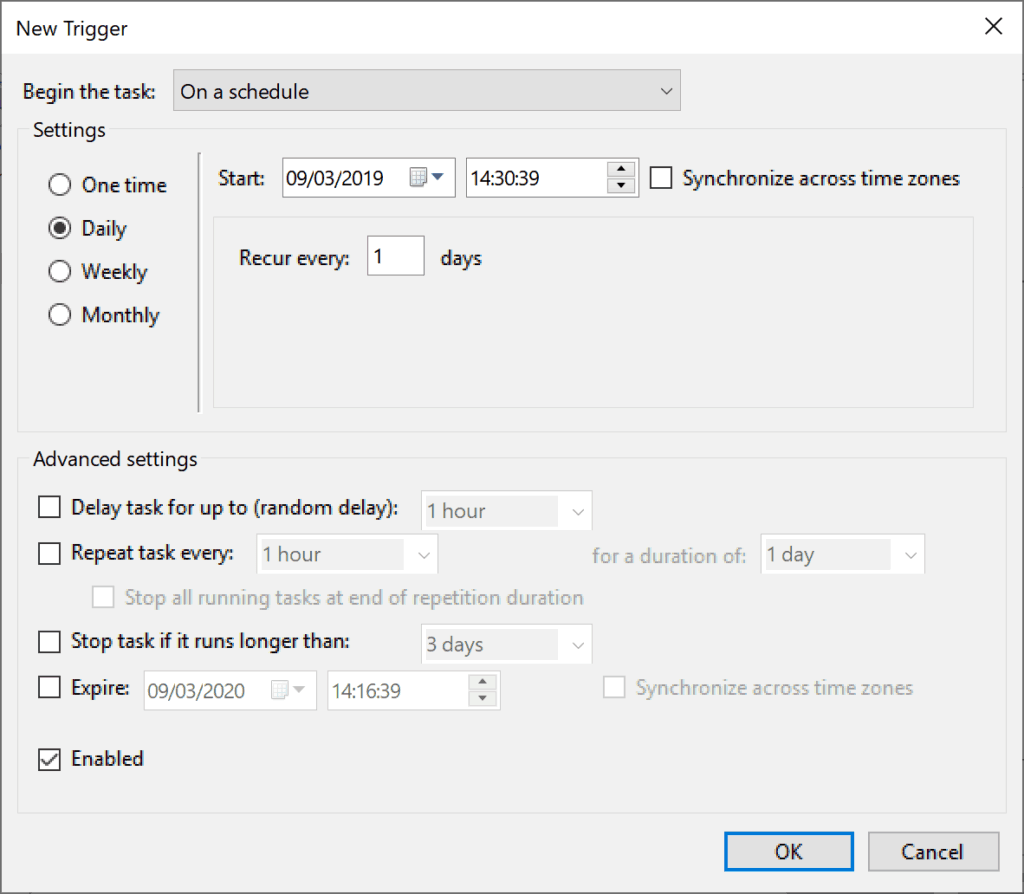
Once you’re satisfied with your Triggers, you can jump on the “Actions” tab. This is where we’re going to specify which applications should run when triggered. Click on the button “New”. This opens a “New Action” window.
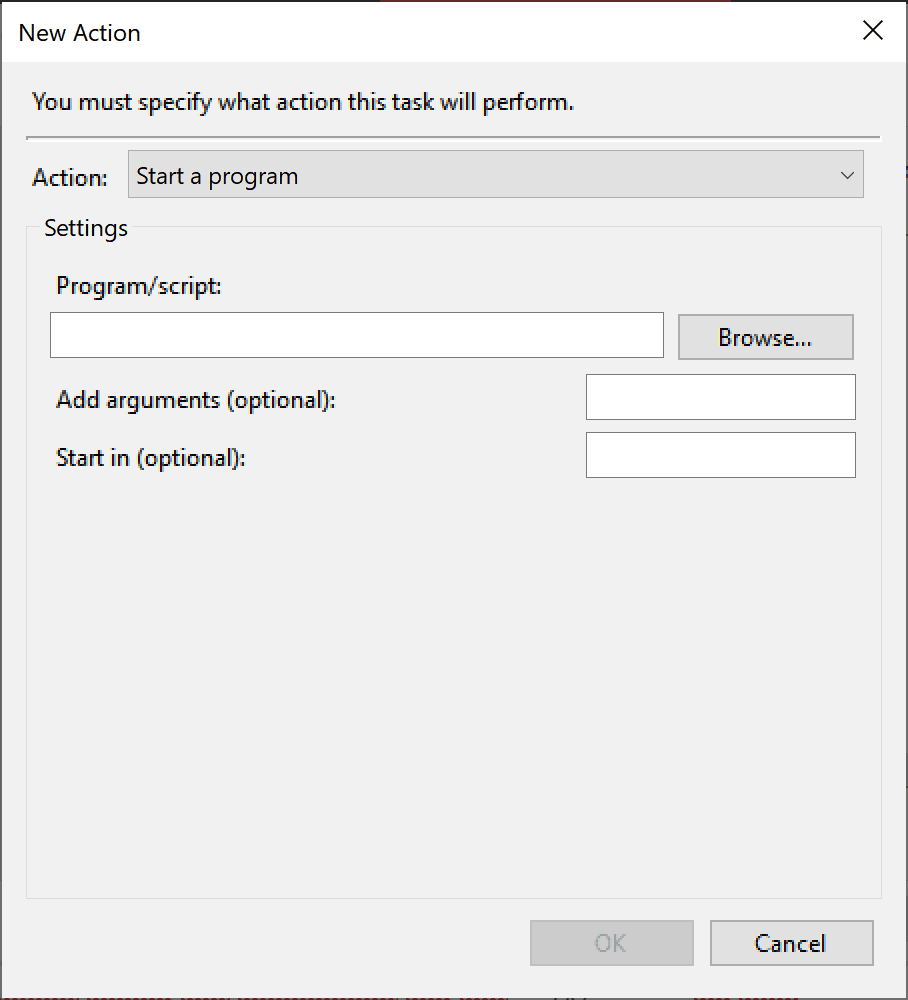
In this window, you can now browse through your list of files and find the one you want to launch when the conditions for the trigger will be met. In our case, we want to select our .bat file that will launch our Python script.
The second thing we really do not want to forget is to set a “Start in” path. Despite being marked as “Optional” it is vital in our case. If not set, our .bat file will be launched from system32 and won’t be able to navigate where our script is. Put the full path to your batch script location e.g. C:\Users\Yaniss Illoul\Desktop (Do not put quotes around Start In).
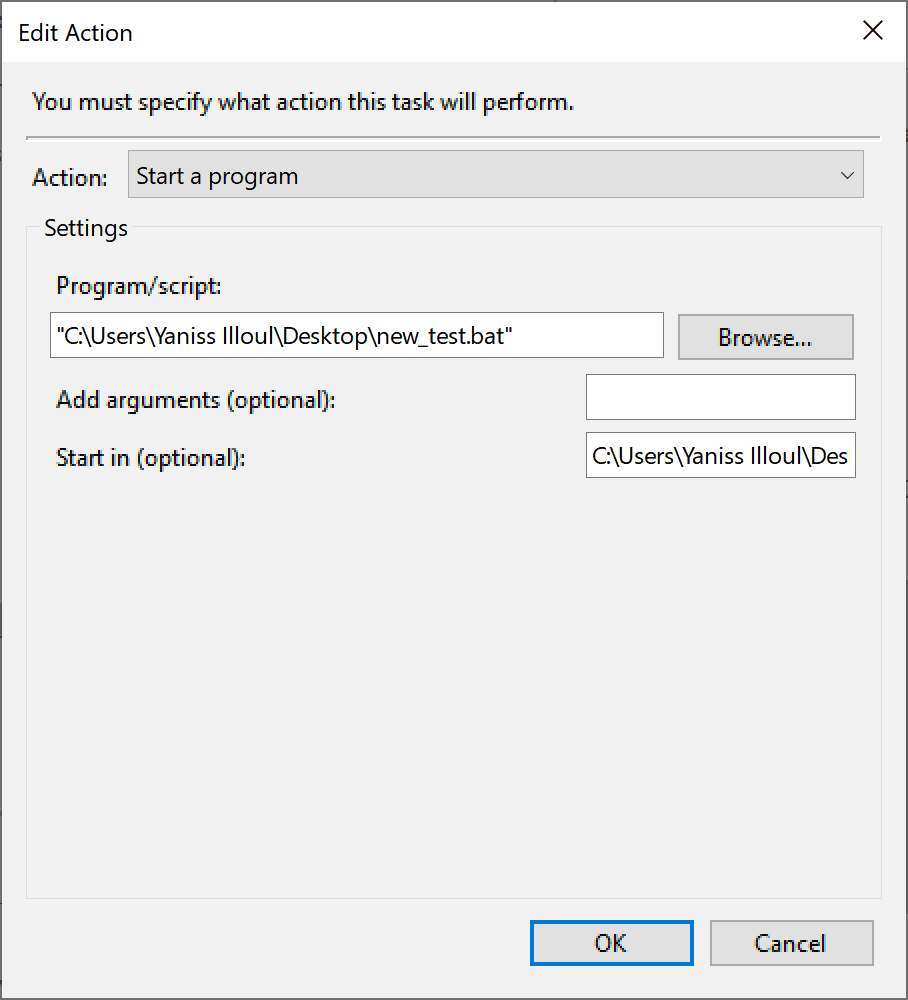
After that, feel free to explore the other tabs but the gist of it has been set up. We can now save our task and it will now appear in our list of tasks in our “Automation” folder. You can come back any time to the Windows Task Scheduler and edit any of the properties of what has been set previously.
And this is it for Windows ! If you have any questions regarding the Windows aspect of this tutorial, feel free to leave a reply at the end of this article and I’ll do my best to shine a light on the issue.
For Mac:
Now that we have our .app file, there is one way that I know that will give us the ability to schedule this to launch following a daily, weekly or even monthly schedule. I learned of this method on
Open your Calendar app (The one provided by Apple) and make sure you selected your iCloud “Work” or “Home” Calendar. What we’re going to create is not compatible with other kinds of Calendars such as Google’s or Outlook’s.
I suggest creating a new Calendar inside the iCloud Ecosystem of Calendars and name it Automation. This way you can choose to toggle on/off the view of all of your scheduled scripts. To do so, make sure you selected an iCloud calendar and click on File -> New Calendar or Option+Cmd+N. This will create a new Calendar inside iCloud that you can name “Automation”.
Once inside this Calendar (Make sure it’s selected), we are going to create a new event.
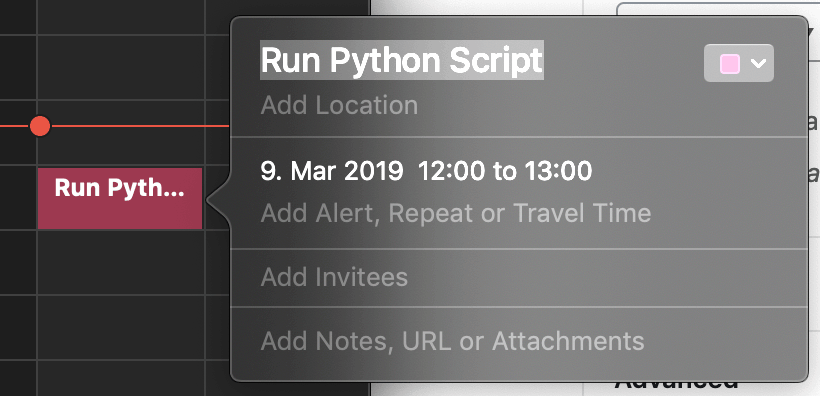
We then need to add an Alert. A “Custom” one precisely, following the screenshot below:
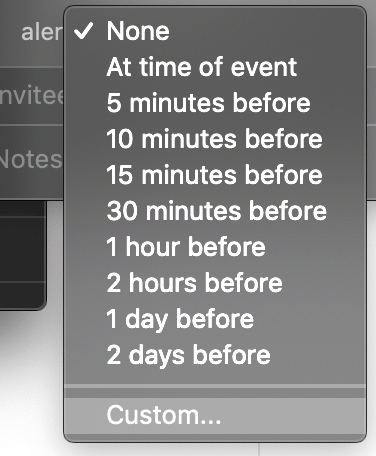
A Custom Alert allows us to set a different action at the time of event. One of these actions is “Open a file”.
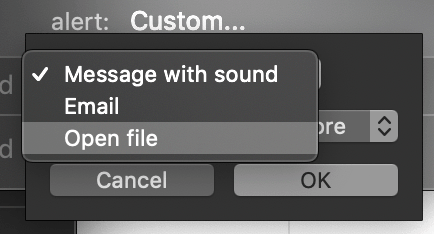
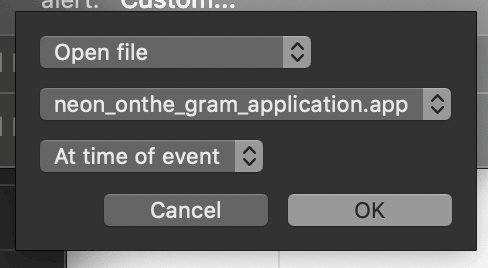
Choose the file .app you would wish to open once the event is triggered and set the “Alert” to trigger “At time of event”
You can even choose to add multiple alerts if you have a set of scripts to run. This way you can set a unique event that will take care of launching all of your applications. One thing to take into account is that you don’t want to mix scripts you would want to run weekly with the one you would want to run daily for instance. In this case you should make two separate events, a “Weekly Python Scripts” and a “Daily Python Scripts”.
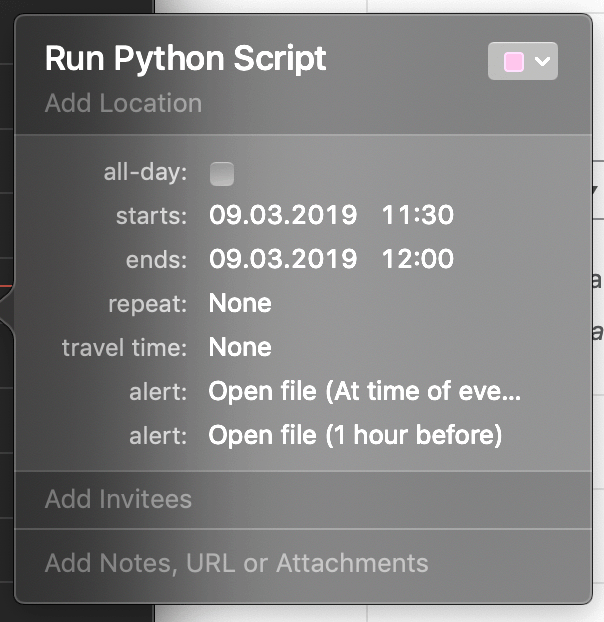
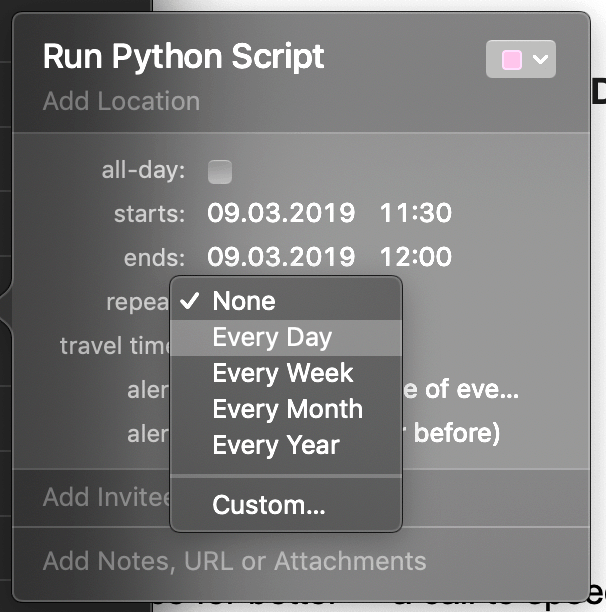
Finally and to ensure that scripts are launched periodically, it is time to define the “Repeat” setting of the event.
And that’s it for
On this note, I’m wrapping up this article ! I hope it solved one problem for you. If you have any question, feel free to leave a reply below and I’ll try to answer as soon as possible !
Thank you for your time,





3 Responses
i know on windows there’s an option to wake the computer to run the script and then let it sleep again
any such option for mac?
Hi, I had some automations that where working just fine until 1 month ago, since then the calendar has been running my codes twice, can someone tell my why?