If you are using Twitter regularly, you know how overcrowded your feed can become once you start following more than a hundred active users. As my interests evolved, I realised that I spent hours reading tweets I was not specially interested in sometimes. I follow gamers, marketers, activists and overall, that gives me a really incoherent feed that does not always align with what my desire are with the platform every time I open the app.
Eventually, I decided that it was time to figure this “List” solution that Twitter has had since the beginning.
What are Twitter Lists?
Twitter Lists are a way for a user to follow a group of user’s tweets and interactions with the platform without having to follow them.
For instance, you can create a list “Marketers” where you would add every marketer you intended on following and another list called “Gamers” where you would add every gaming personality you are interested in.
Afterwards, when you open your Twitter app, you can choose to browse through the activity of the Marketers’ group or the Gamers’ group separately without the tweets from these two groups getting mixed up.
This is a really convenient way to filter through your feed and ensures you are getting what you want out of Twitter every time you open the application.
Another benefit of Twitter lists is that you can share them and make them public or private. Say you are the Social Media Manager of a football club. You could create a Twitter list with every player’s account and share that with your fan to incite them to interact with their favourite team players. If a player eventually departs or join the team, you can easily add/remove accounts from the Twitter list and all of the followers of the Twitter list will see their feed getting updated with the new account.
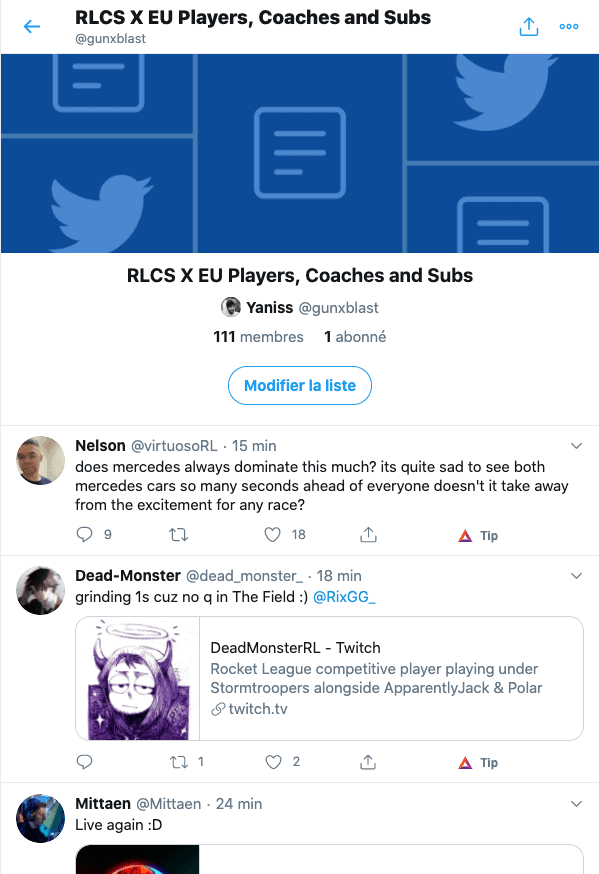
Personally, I use Twitter lists very often to follow players that participate in specific esports events. At the moment, the Rocket League Championship Series qualifiers are happening in Europe for instance and instead of following every player, I created a Twitter List that consists of the 111 contestants so I can follow their reactions and schedule without having to follow 100+ more people on my main account.
There are many ways one can use Twitter Lists, but one pain point I realised quickly is that creating a Twitter list and adding members to it is a really manual and lengthy process.
Fortunately, the Twitter API is pretty resourceful and easy to use and with a simple list of Twitter accounts that I scraped and half an hour of work, I easily managed to automate the creation of this list.
Requirements
There are two things we absolutely need in order to follow through with this project:
- A list of Twitter handles
- A Twitter Developer Access keys/tokens
I am going to share with you in one section how I scraped the website Liquipedia (An eSports focused wiki that compiles the data from teams, players and tournaments in one handy place) in order to retrieve a list of 100+ Twitter handles from the players that are currently competing in the Rocket League Championship Series EU Qualifier.
Obviously, if you already have a list of Twitter handles at your disposal in a convenient format (.xlsx, .csv, …), you can skip the next section and scroll directly to the part where we start getting our Twitter API credentials.
Without further ado, let’s get into it.
Scraping Liquipedia’s Twitter Handles
If you are interested in learning how to scrape website’s data with Python, I have a scraping tutorial available over there. Part of the code I am about to share is also based on my BeautifulSoup starter code kit I quickly built.
This code is really beginner-friendly as I haven’t tried to do any line optimisation of any kind so feel free to examine it if you’re starting out in scraping. Please don’t judge me if you are a more advanced user though, I really haven’t tried hard here :).
At the end of this code extract, you should get a .csv file that contains the Twitter URL of every player that is competing in RLCS X EU Fall Qualifier.
Now that we have our list of Twitter account, we can start thinking about our Twitter API credentials.
Getting your Twitter API Credentials
One thing to note is that you should obviously own a Twitter account before starting this process.
Once you’re signed in, head over to https://developer.twitter.com/ . You may have to provide a few more information about yourself and eventually end up your Twitter Developer Portal.
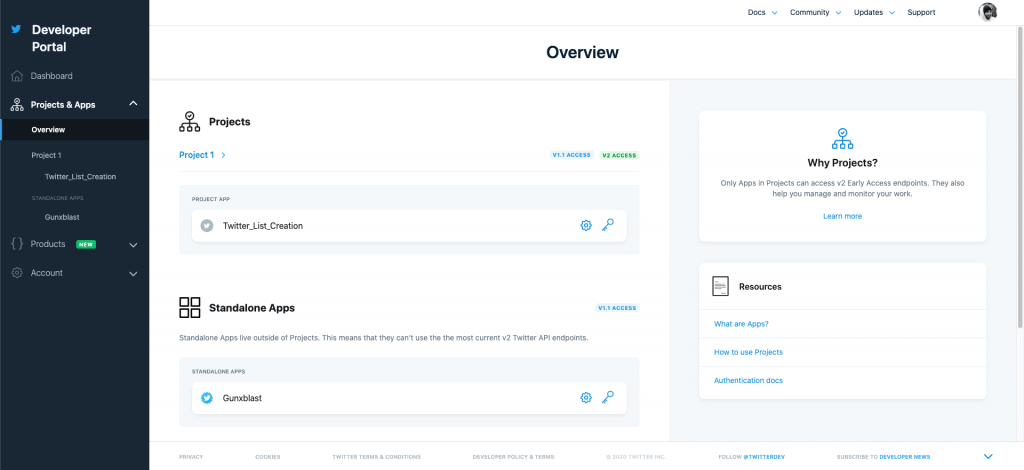
In order to create a new project, we are going to head over to the Project & Apps tab located in the left-hand side of the screen.
Once you’re there, you should have the opportunity to create a new app by clicking on the button “+ Create App“. As I already had a project hosted over there, I had to scroll down a bit to find this button.
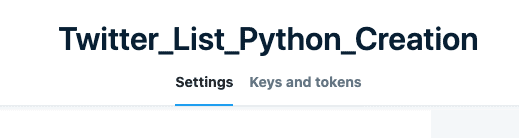
The first step of the app creation process is to name your app. If you’re planning on doing more Twitter app projects in the future, I would recommend you keep the name of this one very clear for the future. I named mine “Twitter_List_Python_Creation“.

Once you clicked the “Complete” button, you will be directed to a new page with multiple keys among which we will need to save two of them.
This might be a good time to create your Python file and assign variables to these keys:
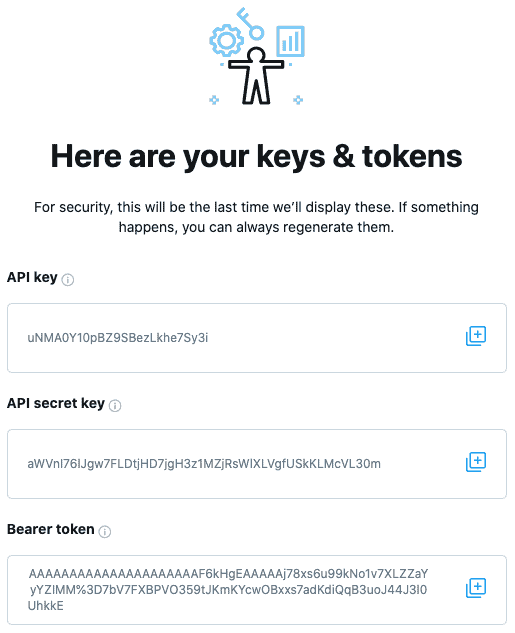
The two keys we are interested in here are the API key and the API secret key. The former should be stored under the variable “consumer_key” while the latter should be stored under the variable “consumer_secret“
Now that we stored these variables, we can continue our App Setup by scrolling down and clicking on the “App Settings” button.
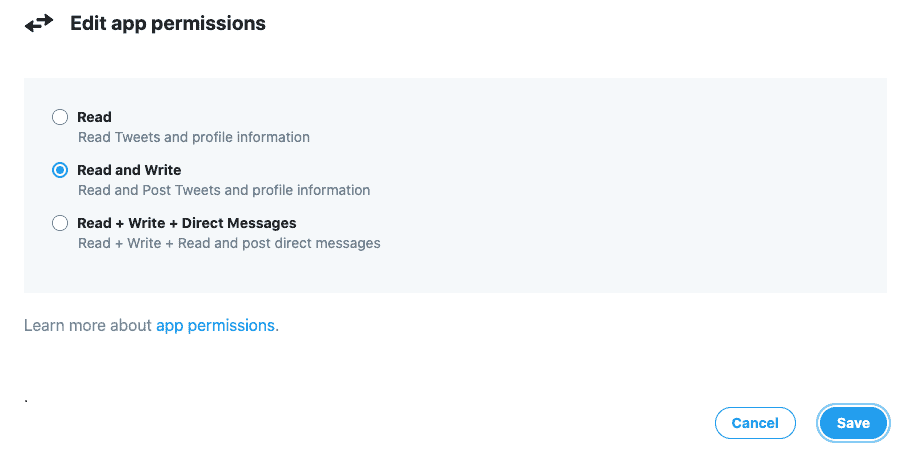
Now, we want to allow our newly created Twitter application to “write” things. When you create a new app, it only has the permission to read information but not to create anything.
Scroll down to “App permissions” and click on the “Edit” button. You will be directed to a new window where you can select “Read & Write” and save this choice.
Now, at the top of the screen on the right side of the “Settings” tab in which we are is a second tab that we are now interested in. Head over to “Keys & Tokens“.
At this point, we want to generate our Access Token and Secret. Simply click on the button “Generate” in front of the Access Token & Secret part of your screen.
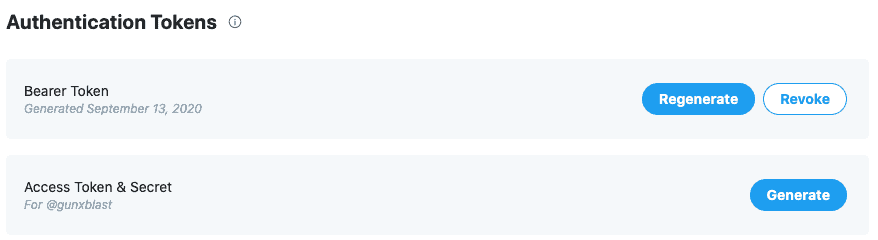
A small window will popup asking you to save these newly generated keys. Simply save your access token as “access_token_key” and your access secret as “access_token_secret” like so:
We can now finally move onto the pure Python part of this tutorial.
Create Twitter Lists with Python
The first thing we want to do here is install the Twitter Python library. Simply pip install twitter and done.
Now, we want to log into our API with this code that uses the four keys we stored away in the preivous section:
Now that we are logged in our application, we need to prepare our CSV file to be in the format that the Twitter API is supporting.
The format we are looking for here is a Python list of Twitter handles. So for instance, instead of “https://twitter.com/gunxblast” , we need just “gunxblast“.
If you are using the CSV created from the scraping file shared in the above section, you can simply use this code to convert the URLs scraped into a Python list that only contains the handles:
From now on, I am going to assume you have a Python list that only contains Twitter handles of the users you want to add in a new Twitter list.
The first thing we want to do now is to create an empty Twitter list. in order to do so, we simply need to call the “CreateList” function of the Twitter API and fill out the arguments.
As you can see, one of the arguments of the CreateList function is ‘name‘. We can also write a description in the description argument.
Finally, I am also storing the ID of the newly created list by calling the .id class at the end of the createList function and assign it to the variable RocketLeague_ListID. This ID is important in the sense that it’s going to be used in our next line of code to say to which list we want to add our Twitter handles.
You can verify that your list has been created by going on your Twitter profile and click on the “Lists” section on the left side or head over to this url: https://twitter.com/gunxblast/lists (replace “gunxblast” with your account handle).

Finally, we can now add all of the Twitter handles to our list by calling the “CreateListMember” function that only requires two simples arguments: “list_id” and “screen_name” .
The list_id argument is going to be the ID you retrieved from the creation of the list in the previous line of code.
The screen_name argument is going to be the Python list that contains all of the Twitter handles to be added to the list previously created.
And this is it. “Just like that”, we now have a full Twitter list ready to be shared and consulted.
As you can see, the bulk of the work here is mainly on the scraping side of the URLs as the process of interacting with the Twitter Python API is actually really straightforward and easy.
Conclusion
So that’s it for today’s article. I certainly do hope you learned something in this article and as always, if you’re looking to learn more about Python and its uses in marketing environment, I highly encourage you to sign up to our newsletter using the form down below to be notified of the next tutorial.
If you have any questions or comments, feel free to leave them in the comments section or reach out to me by email and I will try to get back to you as soon as I can.
Thanks again for your time,