Mechanical Turk is a great tool to complement your Content Marketing campaigns, do Market Research or help with your Data Collection tasks.
I personally use it to enhance the credibility of our insights for my day job. While it is a pretty effective tool that I believe in, its interface and the way sections are organized can turn campaigns into a pretty chaotic mess. Moreover, some features are really complicated to reach/enable and the documentation available is pretty scarce, not to mention very technical.
In this article, I want to go through the act of making sure that when you publish a new batch on Mechanical Turk from a job that has already been published once, workers that already completed the task previously will not have access to the new batch.
It should be such a simple thing to do, yet, as you’re about to discover, there is a few hoops one needs to jump through in order to achieve this feat. So without further ado, let’s get into it.
Create a Custom Qualification in Mechanical Turk
The goal with this tutorial is to create a custom qualification for our workers that is going to be filled with the workers that have previously completed tasks with us.
In order to create a custom qualification, head over to the Qualification Types in your Manage section. If you are already logged in, this link should direct you to it: https://requester.mturk.com/qualification_types
Once you are there, you should see this button depicted below, which you can click already so we can start the process of creating a custom qualification:

After having clicked, you will be greeted by this pop-up window with two simple fields.
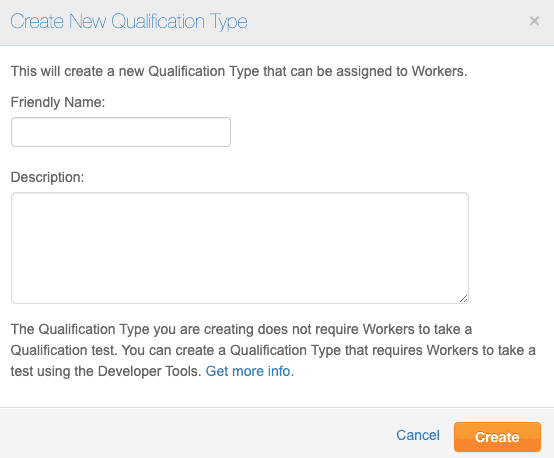
Both of these fields are mandatory. In order to make it easier, I named my qualification “CompletedOnce” and wrote a generic description. Notice how I did not input any space or special characters in my “Friendly Name” field. This is important and I suggest you follow this structure as well with whatever friendly name you choose to use for your qualification.
Once this is done, we can proceed by clicking on the Create button available at the bottom right of the pop-up window and follow the second section of this tutorial.
Export Workers that have Completed Tasks in Mturk
The second thing we want to do is to get a list of everyone that has completed a task previously.
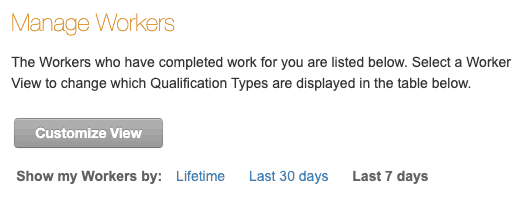
To get this list, we need to go to the Workers tab present in our Manage sections. If you’re already signed in your MTurk’s Requester Account, the correct link is as follows: https://requester.mturk.com/workers
Once you are there, you will be able to filter Workers depending on when was the last time they have been interacting with one of your projects. I. my case, I only want to exclude from my future batches the Workers that have already completed work in the past 7 days.
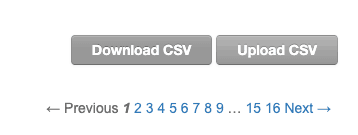
Once you have filtered the view to only show your workers for however long you were interested in, focus your attention to the right side of the interface. Our intention now is to export this list in an easy to edit format and the button Download CSV at the top-right side of our screen does just that.
Once you have clicked on this Download CSV button, you will be directed to a new window with a loading text box. Depending on the amount of workers under your tasks, it might take a certain amount of time before you will be greeted by this screen:
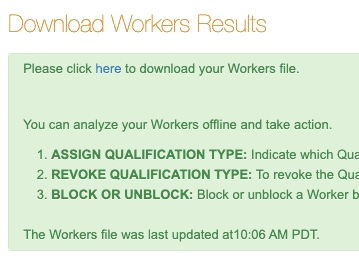
As you can imagine, clicking on the “here” button will automatically download a .csv file.
Now that we have our file, we can proceed to the third step of this guide.
Assigning Custom Qualifications to Workers in Mechanical Turk
This is the process that should, in my opinion, be greatly simplified. Unfortunately, it is not so simple so follow these instructions carefully.
Open the previously downloaded CSV file in your spreadsheets software of choice. I personally use Google Sheets but Microsoft Excel works as well. I’ve also tried with Numbers on Mac and unfortunately, Numbers is complete crap at editing CSV files and should therefore be avoided at all costs.
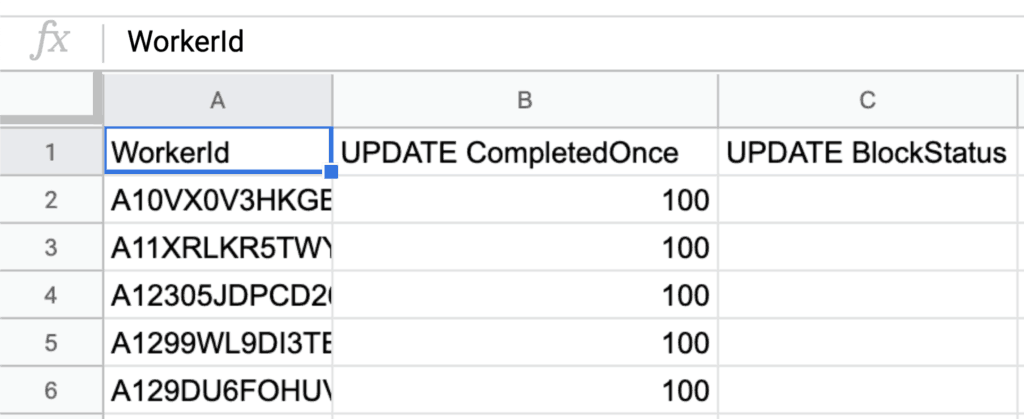
After having imported your file, delete every column except “Worker ID” and “UPDATE BlockStatus”. Replace the header of the column “Worker ID” to “WorkerId” and add a column named “UPDATE-FriendlyNameOfYourQualification”. Obviously, replace “FriendlyNameOfYourQualification” with the actual friendly name of the custom qualification you created in the first section.
In this newly created column, specify a value of 100 in front of every Worker ID present in your CSV file like shown below:
After having done that, we can save our modifications in the edited CSV file.
The next thing we want to do is to upload this CSV back into Mechanical Turk. To do so, go back to to the Workers tab in your MTurk interface (https://requester.mturk.com/workers) and click on the button “Upload CSV” at the top-right corner of the screen.
After having chosen the CSV file we wished to upload and clicked on the orange “Upload CSV” button, you should be directed to a processing window.
The same way we waited for the CSV file to be available for export, we are now waiting for the interface to process the CSV file we just uploaded.
After a brief moment, a confirmation window should appear like this one, letting you know if anything went wrong and what are going to be the effects your uploaded CSV will have on your Workers’ pool.
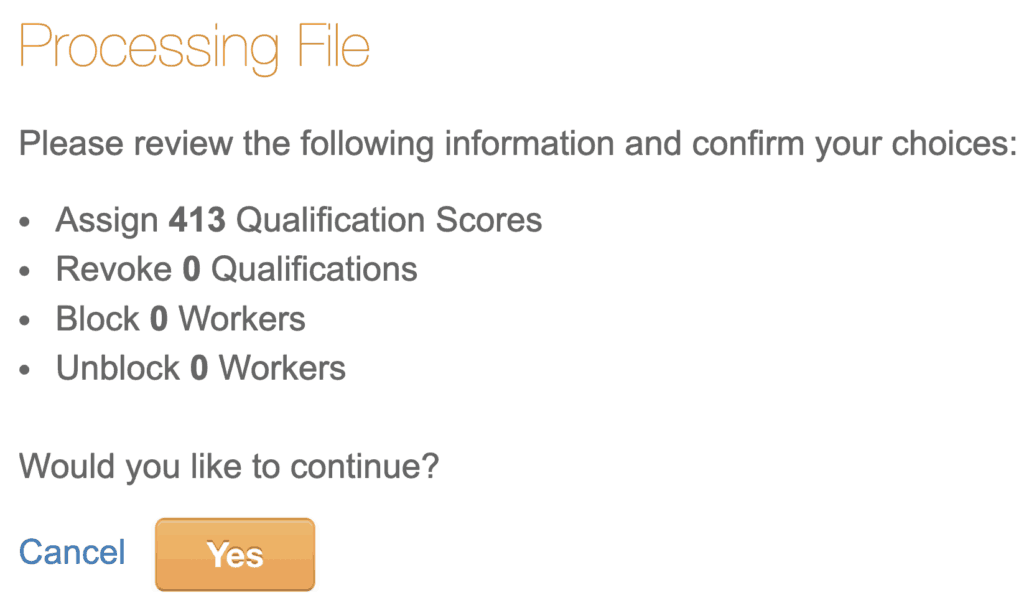
In my case, I indeed added a Qualification value to 413 workers in my CSV. We can now just press “Yes”.
After a few minutes, we can make sure our Qualification does indeed show up with the appropriate number of workers by going to our Qualification Types window (https://requester.mturk.com/qualification_types). Looking at the column “Workers who have this qualification” does indicate the correct number, showing us that this maneuver did work.

We can now jump to the latest stage of this whole endeavor.
Excluding Workers with our Custom Qualification in MTurk
Finally, we can use this Custom Qualification to exclude workers from participating to our batches.
If you create/edit a project, we can now scroll down to the list of criteria and add our Custom Qualification to the mix of criteria for each individual projects like shown:

And that’s it. Easy as that. You can now publish a batch of this project and be sure that no workers that have previously completed a job for you will be able to see this new batch/this project.
Conclusion
And voila. I hope this article has been helpful to you. As usual, if you have any questions, feel free to drop me an email or to follow up in the comments section down below.
If you’re interested in more articles of the sort, I can only invite you to join my newsletter using the form down below so I can keep you updated with all of the good stuff upcoming.
Thank you for taking the time to read this article up to here.
Take care,