When migrating from one Email Marketing tool to another, a lot of work has to be done to make sure that your database of contacts stays consistent between the two systems and that your leads inherit from the attributes they have been cumulating over time.
Thankfully, Mautic offers a powerful import feature from within the browser that allows you to upload CSV files. The annoyance though is when your existing database of contacts has a lot of fields that do not automatically get matched to Mautic’s own fields. In this article, I want to show you how to format your files the right way in order to ensure yourself a painless importing process.
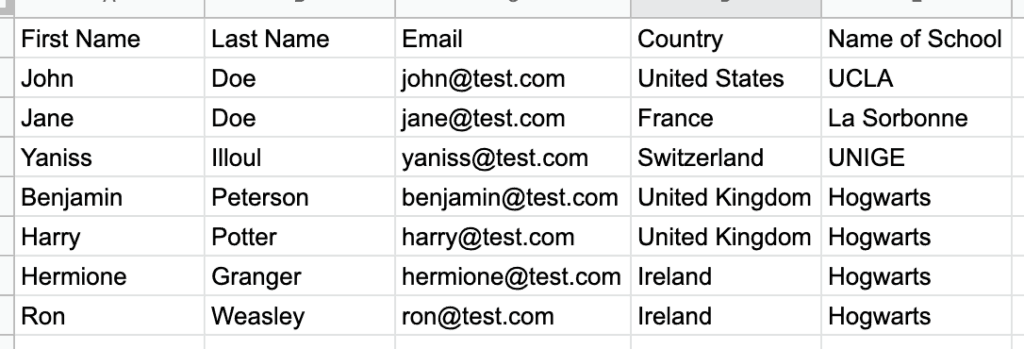
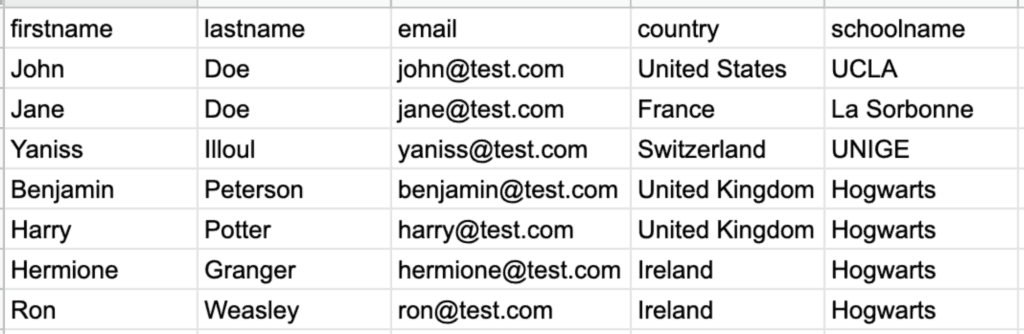
In order for you to follow a “real-life” example, I’m going to base these screenshots on this spreadsheet:
Make an inventory of your required fields
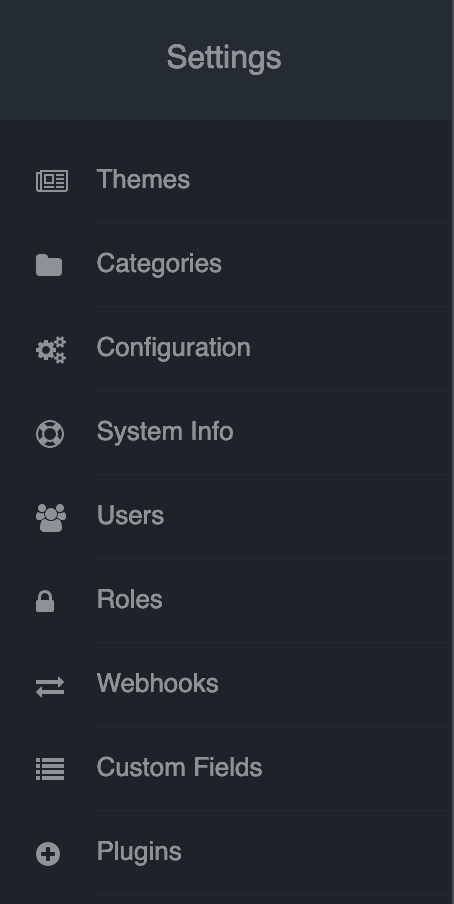
The first thing you want to do is look at what you have exported and if Mautic supports these fields natively. To check the existing fields that Mautic supports, head over to your application dashboard and open the Settings column at the right side of your screen.
From there on, you can click on “Custom Fields“.
This will open a new window, filled with all of the fields that are currently installed on your Mautic instance.
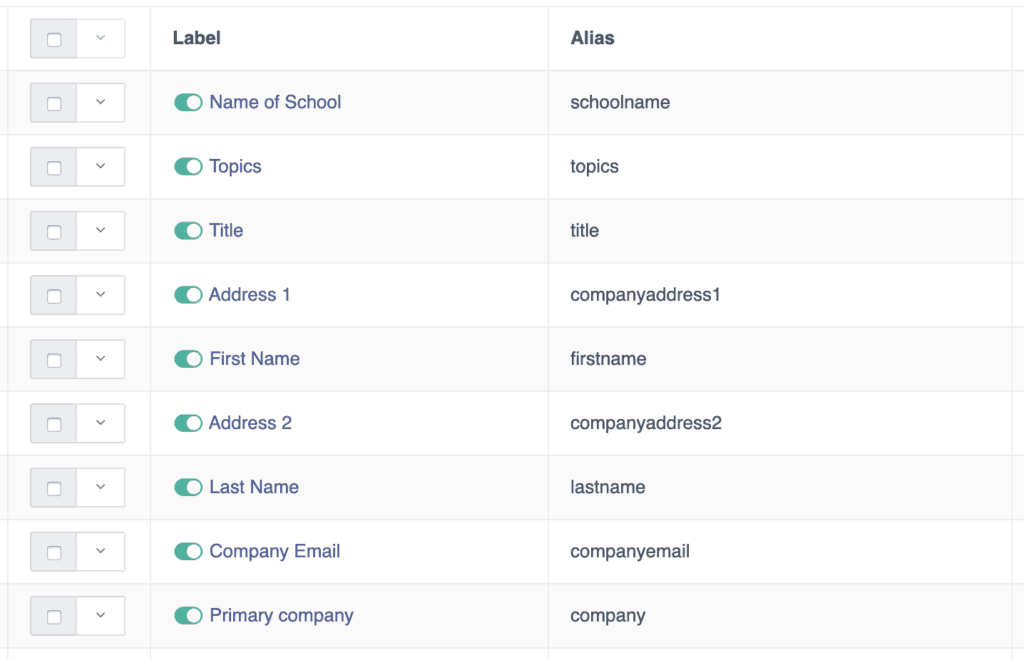
From then on, we want to compare the list in front of our eyes to the one in our data.
In my case, I can see that the only thing not supported form my list of contacts is the Name of School column.
Create New Custom Fields in Mautic
In order to palliate this problem, Mautic thankfully offers the possibility of creating your own custom fields that you will be able to used later to filter your contacts when creating segments and campaigns.
To create a new custom field, simply click on the “New” button at the top-right corner of the Custom Fields window.
You will then be greeted by this window:
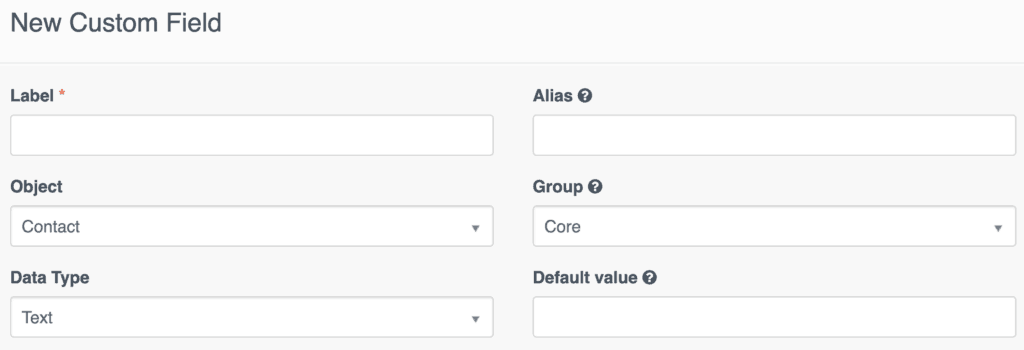
Here is how I am going to fill this window up for my case which consists of adding a school name custom field.
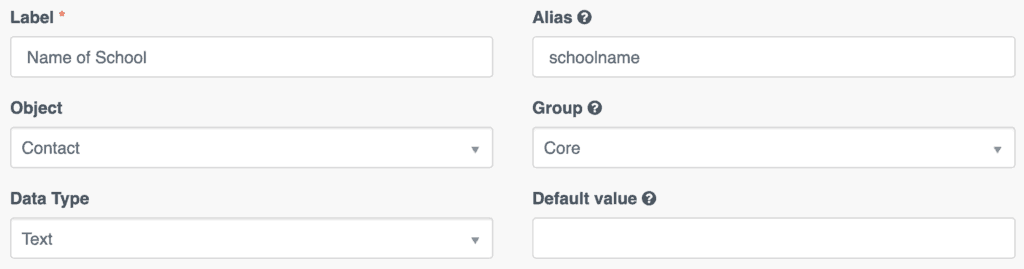
The label is the name of the custom field.
The interesting part here is mostly the Alias. The alias is how Mautic will refer to it internally. This is also what the header of my column should be named for when I am going to import my CSV file in order for me to not have to match every column by hand.
Now that I have my new custom field set up, I can Save and Close and go back to the list of the Custom fields in Mautic.
Matching our Exported Columns to the rights Aliases
From the list of all of Mautic’s custom fields, I am looking for the aliases of the fields I have to match when importing my contacts.
| Column Name | Alias |
| First Name | firstname |
| Last Name | lastname |
| Country | country |
| Name of School | schoolname |
Now, we just need to replace the column names by the aliases we collected like so:
Import Contacts by CSV in Mautic
Now that we have our spreadsheet ready, we can download it or export it as a CSV file.
Once we have our file in hand, we are free to proceed to the last stage of this article, which is actually importing the contacts in our instance.
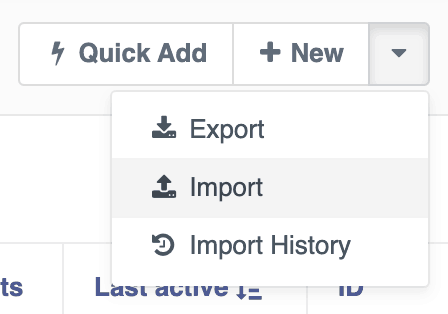
To do so, head over to the Contacts window available on the left side of your interface
Then, find the import button located at the top-right corner of your screen like so:
After having clicked on the “Import” button, you will find yourself facing the import window, prompting you to browse your hard drive in order to find the CSV file where all of your contacts reside.
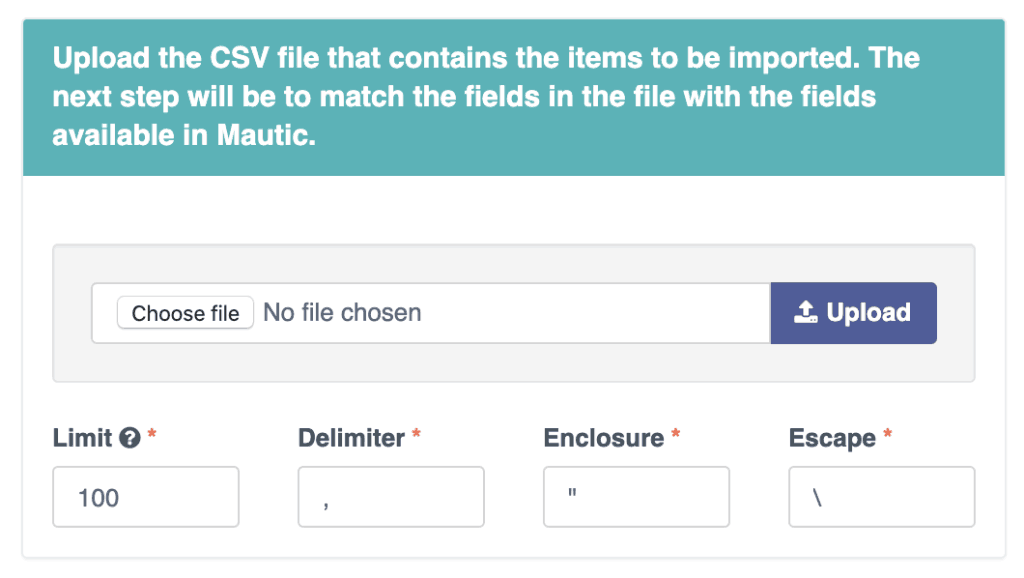
Once selected, you can proceed by clicking on the “Upload” button.
Now, if you have been correctly replacing the header of your column by the aliases previously mentioned in the “Matching our Exported Columns to the rights Aliases”, you should find that Mautic automatically matched our columns to the right custom fields like this:

Conclusion
And that’s pretty much it. There is nothing more to it than that. The TL;DR of this article could be “Find the aliases of the custom fields you have in Mautic’s library and replace your headers by these. Import, upload and you’re done.”
I hope this article will reveal useful to you. If you have any question, feel free to reach out to me by email or in the comments section below this article and I will answer you as soon as I possibly can.


3 Responses
Hi,
Great article thanks very much, however no matter how many times i try and put in email address, Mautic will not match it.
Also how would you add Do Not Contact ? I have tried do_not_contact, Do_not_contact, properties_Do_not_contact etc… and cannot get it working
Hey thanks for reaching out and thanks for the kind words :)!
Are you putting “email address” in the header or just “email” ? I tried again this morning and it worked for me. What is your Mautic version ?
For the “Do not contact” column, as it is not a custom Mautic field, you will always have to match it manually. From what I understand it has to do with the fact that you can be DnCed from Email but not from SMS and unfortunately the team behind Mautic has not considered this a real issue. It’s even more of a problem when you want to export your contacts as the DNCed contacts will not show in the Export…
Anyway so yeah you are going to have to manually match the Dnc column to the “do not contact” property. Then the actual value for each row should be TRUE or FALSE 🙂
Hope that helped/cleared some stuff!
Ref “you are going to have to manually match the Dnc column to the “do not contact” property.”
Can you please explain further? — Mautic does not appear to have a ‘Do No Contact’ field to match/map